Showing posts with label watercolor. Show all posts

Wednesday, November 12, 2025

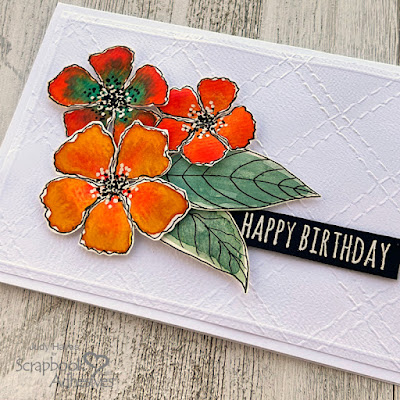
Floral Thank You Card

 Hello!

Today, I have a pretty Floral Thank You Card to share.  


I used Trinity Stamps Sketchy Florals stamp set along with coordinating die set. The flowers are so fun to color with watercolors 

For more details and all the directions to make this card, check out post HERE on Scrapbook Adhesives by 3L Blog.

Thanks so much for visiting!

Judy


Materials Needed:
Scrapbook Adhesives by 3L®

E-Z Runner® Petite Permanent Dots Refillable Dispenser

3D Foam Creative Sheets Small White, 3D Foam Strips Large White

Other: Stamp: Trinity Stamps (Sketchy Florals); Ink: Tsukineko (Versafine Clair Fallen Leaves, Morning Mist); Craft Dies: Trinity Stamps (Sketchy Florals); Watercolors: Yasutomo (Niji Artist Watercolor Studio Set); Watercolor Paper: Ranger (Distress Watercolor Paper); White, Light Blue, Dark Brown Cardstock


Tuesday, April 29, 2025

Pretty Floral Card

 Thinking Spring with this Pretty Floral Card.  Beautiful for a Mother's day card.


Find all the details on Scrapbook Adhesives by 3L Blog today.  Click HERE to go there.

Thanks for visiting!

Judy


Materials Needed:
Scrapbook Adhesives by 3L®

E-Z Runner® Ultra Strong Refillable Dispenser

Thin 3D Foam Squares White Mix

Adhesive Dots Medium

Other: Stamp: Spellbinders Paper Arts (Stylish Oval Birthday Wishes); Ink: Tsukineko (Versafine Onyx Black); Embossing Powder: Ranger (Clear); Craft Dies: Spellbinders (Ovals); White + Sage Green Cardstock; Ranger (Distress Watercolor Paper); Watercolors: Prima (Classic Colors); White Seam Binding


Friday, February 10, 2023

Watercolor Flowers Friend Card

Cards with my own watercolor flowers have become my favorite cards to make!  As long as I have flowers painted and ready in my collage fodder notebook, these cards are easy to make.  


If you follow me on Instagram, I sometimes post photos of these flowers in process.  I start by painted simple shapes to form a flower shape.  Once it's dry, I add outlines and details with a black Uni-Ball Signo pen and a white one.  That's when the flowers gain their personality!  Thanks to @TiffanySimplySharpe and @WillaWanders for Fodder School class where I learned a few techniques to get started making flowers! 


The oval white background was left over from another project. I found a piece of pink paper to coordinate with my flowers and stamped a grid pattern on it with white ink. The flowers are fastened in place with 3D Foam Squares.  I fussy cut the verse after stamping with black ink.  It's from Penny Black. It's also fastened with 3D Foam Squares.  I tucked a pearl cotton bow under the flowers.

Thanks so much for visiting!

Check out my Instagram for more of my craft projects.  Simply search for Judesigns7


Sunday, March 13, 2022

Bright Flowers Birthday Card

Thinking bright, sunny and warm today with this Bright Flowers Birthday Card to beat the winter dreariness!  


 I made this card for Scrapbook Adhesives by 3L and you can find it on their blog.  Lots more details posted there.

I made all the flowers with watercolors.  Once they were dry, I added black outlines with Uni-Ball Stabilo 207 pen and used it and a white pen for the dots in center of flowers.  Leaves were also painted with watercolors and outlined.  Then I fussy cut them out.  I've come to enjoy the process of painting them and "doodling" the outlines, centers and more.  Even the fussy cutting is relaxing!  I usually do all the steps over a few days....no rush. I generally take time to go to my craft room every night before bed.  I usually don't start any projects then but I doodle around flowers or cut them out.  It's mindless and enjoyable.  

These particular flowers I painted one afternoon while showing my sister how to make them. The flowers really come to life with the outlines and added dots and lines.  


Here's some of the flowers in my fodder keeper.  I learned the basics for making these flowers and the fodder keeper in Fodder School which is a yearlong class with different instructors each month.  The instructor for this class was Tiffany Sharpe.  You can find her on Instagram as TiffanySimplySharpe. Fodder School was created by Tiffany and Wendy Solganik.  Wendy is on IG as Willa.Wanders.  Fodder School has been great so far!  I'm a bit behind but it's always there for me to do when I have time.

You can find me on Instagram as judesigns7  I have photos posted there of my fodder keeper and more flowers.

Thanks for stopping by! 

Happy Crafting!

Judy


Sunday, June 13, 2021

A Pocket Card of Wishes

 Here's a pocket card I made for Scrapbook Adhesives by 3L.   


I took a mini class from Kat Kirby to learn how to make the basic pocket which she likes to embellish with collage and more. Instead of collage, I chose a pretty scrapbook paper and then made coordinated tags and bookmark to tuck in the pockets.  
Lots of details about how to make it on Scrapbook Adhesives by 3L Blog. 


thanks for visiting!

Judy

Thursday, April 29, 2021

My Project for Scrapbook Adhesives and Whimsy Stamps Insta Hop


📣 Insta Hop & Giveaway Alert!! 🎉 


I'm excited to be participating in the Scrapbook Adhesives by 3L + Whimsy Stamps Insta Hop for a week-long event filled with projects to inspire you! PLUS two special prize packages to giveaway: one full of Scrapbook Adhesives by 3L adhesives and one wonderful gift certificate from the Whimsy Stamp store…are you in? 🙋🏻‍♀️ 

. 

Each day this week, visit each companies’ Instagram account to see NEW design teams’ creations to WoW 😲 you with! 


Today is my day to share a card on the Insta Hop.  I also have a post on Scrapbook Adhesives by 3L blog today with details of how I made the card.  Be sure to check that out! 

_ _ _ _ _ _ _ _ _ _ _ _ 

 I chose a Whimsy Stamps red rubber stamp called "The Mailbox".  So appropriate for me having worked so many years for the post office!  


I stamped the image on watercolor paper and used watercolors to color it.  By using Thin 3D 

Foam Squares to fasten the matted image, it adds a bit of dimension to the card. 

The verse is from Whimsy Clear Stamp Set "Enjoy The Journey".  It's popped up with Thin 3D 

Foam Squares at top and 3D Foam Squares stacked with Thin 3D Foam Squares at the 

bottom.  

That allows it to lay flat as it laps over the image which is already raised and also fastens to the card front which isn't raised. It's easy to create the amount of dimension by layering different 3D Foam Squares.  

There are lots more details about making this card on Scrapbook Adhesives by 3L Blog today. 


I have a post on Instagram today with details about the giveaways.  You'll need to go on Instagram to enter for the giveaways.  My Instagram name is judesigns7


Make sure to visit each one for more chances of winning!  You have until 11:59 PM Eastern on Saturday, May 1, 2021 to enter.  You can always go look at all the inspiration if you missed a day or two. 


Day One Hop List:

@scrapbookadhesivesby3l  

@scrapbookingwithchristine 

@lauren.taylor.made 

@ilscraps 

@fayewynnjones 

@whimsystamps 


Day 2 Hop List:

@scrapbookadhesivesby3l  

@inkspots 

@crafty_mercer 

@tanglemousecards 

@scrappychick101 

@whimsystamps 


Day 3 Hop List:

@scrapbookadhesivesby3l  

@journeycoachjenn 

@dpauleydesigns 

@teriplans 

@embellish.craft.love. 

@whimsystamps


Day 4 Hop List:

@scrapbookadhesivesby3l  

@triciabarber11 

@judesigns7  - my name on Instagram

@westie1702 

@danatatar  

@whimsystamps 


Day 5 Hop List:

@scrapbookadhesivesby3l  

@stampthis 

@iriswiechmann 

@yvonnevandegrijp 

@wizardessofcards 

@whimsystamps

Good luck 🍀 and have fun! 


#scrapbookadhesivesby3l #craftadhesives #whimsystamps #ighop #giveaway #cardmaking 

#cardmaker #cardmakersofinstagram #cardmakinghobby #cardsofinstagram #cardmakingfun

#cardmakingideas #diycard #papercraft #papercrafting #papercrafter #greetingcards 

#handmadecard #handmadecards #carddesign #rubberstamping #clearstamps #watercolorcard

#watercolorcards #fussycut #carddesign #carddesigner #carddesigns #fussycutting #greetingcard

Attachments area

Wednesday, February 17, 2021

Stencils and Watercolor Play

 Last week one evening, I tried watercolor with stencils. I laid out some stencils on watercolor paper and colored them with watercolors.  Pure experimentation!  


I used a large 9x12 stencil by Pam Carriker with a small piece of watercolor paper to get just a portion of this face.  This photo shows stencil in place after I washed on color.


Here's what it looked like after removing the stencil. I really like the face! 


I decided to play and just let go and color it with watercolor !  I like watercolor but I'm still learning how to use it.  Not sure where I'll go with this next.  I may add it to an art journal with more stamping and some collage....  


I also worked with this Icelandic church stencil by Tina Walker.


I controlled the watercolor more with this than the face so it wasn't so wet.  In this photo, stencil is in place, it's wet and set aside to dry.


After drying, it looked like this.  I really like all the detail that came through even with watercolor!


But then since I was playing, I added more watercolor above the church and washed light brown over the ground.  Now, looking at the photos, I prefer it as it looked after stencil and before I added more color.  Either way, I really like this stencil!

It was fun art experimenting!

Judy