Showing posts with label Becca Feeken. Show all posts

Wednesday, December 11, 2019

Amazing Paper Grace December Die of the Month Blog Hop

Sponsored: As a designer for Amazing Paper Grace, I receive dies to create projects.   I'm also a designer for Scrapbook Adhesives by 3L and receive product to use for projects.


Every now and again you need easy, right?  We've become huge fans of slip-in cards.  They are cards that are cut partially inlaid so that you can simply slip a decorative panel into place and you're done.  This months Die of the Month is called Rose and Filigree Duo Slip in Card.

 Your panel can be decorative, textured or simply a sentiment.  The partial inlay can be positioned just where you want it on your card from one side to another or midway.  It can even be used to make a gate fold card or an actual belly band.

My favorite part of this December Die of the Month is that the band can be set wherever I want it within the rectangle.  I also like that there's a separate outer cutting die for each band design.  That makes it so easy to cut a contrast background to fit behind.  I especially like the rose band.  It made me think of stained glass windows when I saw it.  I've used it to create that look on my second project.

On the card shown above, I've cut the band slightly towards lower edge of rectangle and used it horizontally on my card.  I cut gray solid piece to fit behind it as well as pearlescent white paper to make contrast edges.  My photo doesn't' show that very well.  To make border, I simply cut the background piece n half horizontally and fastened the pieces with a narrow reveal along the edges.  I used Hemstitch Rectangles to cut my insert.  It fits so well!  I stamped LOVE at the top and script at the bottom with gray ink.  I added pearls and a heart gem to the band.
Rose and Filigree Duo Slip In Card
Project One:


This card uses the Die of the Month as it's designed to cut a band across a rectangle.  It's a beautiful element that requires only an insert slid behind the band.  I've added stamped elements to my insert.

Project Two:  


For my second card, I chose to cut the band to fit a 4.25 x 5.5 inch card.  The band is separate and cut at each end to fit the card.  

First, I cut the the rose design band from black card stock with Adhesive Sheets applied on back side to make it easy to fasten to the background piece.  I cut a solid band from white card stock using the outer die only.  I placed the rose die on it and put it through my die cut machine with an embossing sandwich.  I used a thinner plate so the embossing wouldn't cut the paper  That allowed me to see the design so I could color the roses and leaves with Distress markers.  I love the stained glass look!
  
Along each edge of the band is a gold border and black one.  To get those, I cut a solid band from black and one from gold.  I cut each one in half so I could fasten the edges beyond the band on each side.  The band is fastened over music paper with gold strips along the fold edge.  I added a verse popped up with 3D Foam Squares. 


This Die of the Month is so easy to used for a band card with insert!  But, it's also easy to use the bands separately by cutting them at each end.

I hope you've enjoyed my projects.......and taken some inspiration to use on your own projects! 

Be sure to check out the other designers projects!  All unique projects with inspiring ways to use this Die of the Month!  Links are below.

Thanks for visiting!
Judy

Supply List:
Stamps:  Penny Black 'love chapter'; KaiserCraft 'Sympathy'
Paper: Card Stock - Bazzill Pink, Fig Swirl, Black, Cream, White; Pearlescent White; Music Paper; Gold Metallic
Ink: Ranger Cool Graphite Dye Ink; Imagine Crafts/Tsukineko Versafine Onyx Black
Accessories: Pearls; Heart Gem;
Distress Markers - Peeled Paint, Tattered Rose, Worn Lipstick, Candied Apple
Dies:  Spellbinders Hemstitch Rectangles
If you want to find out more about the Club - prices, how you sign up and what's included, please look --------HERE.

If you missed the introduction and want to know more about what inspired the Die of the Month Club, look -------HERE.

More inspiration is just a click away.  Stop by with each Creative Team Member to see how they manipulated this die to come up with a unique project for you to try!
Visit Kate        - craft2owls.blogspot.com
Visit Joanna   – joannakrog.blogspot.com
Visit Teresa   –  victorianpaperqueen.blogspot.com
Visit Ewelina -  elinaart.blogspot.co.uk
Visit Becca     – amazingpapergrace.com/blog

We can’t wait to see what you make with these exclusive dies – be sure to post your creation on the Amazing Paper Grace Die of the Month page ------ HERE or on Instagram using the hashtag #AmazingPaperGraceClubKit


Sunday, March 10, 2019

Amazing Paper Grace March Die of the Month Blog Hop


Sponsored - As a designer for Amazing Paper Grace, I  receive dies to create projects.   I'm also a designer for Scrapbook Adhesives by 3L and receive product to use for projects.

Do you ever suffer from blank page syndrome?  Or do you clear your schedule and your table and sit down to make a card, and bam - your mind goes blank.  That's why we're here!  We love bringing you inspiration for the Die of the Month and today is our Die of the Month Blog Hop for March.  

Since we all see things differently, it's our aim to show you how each of us approached designing with this die and the lovely pieces that are a part of it.  Our hope is that you snag a picture or two for your inspiration file and they come in handy next time you sit down to create.  Our list of links at the bottom of the post lead to all the inspiration.

The six pieces that make up Spun Blessings Oval combine to make a card front die, perfect for a background or you can creatively use all of the inlays for either accents or borders.  You may have noticed, it's a big die but the better to make alternative designs like the little baskets that help to create an ensemble.

If you want to find out more about the Club - prices, how you sign up and what's included, please look --------> HERE.
If you missed the introduction and want to know more about what inspired the Die of the Month Club, look ------->HERE.

Here's my card today....


 I've used all the dies as shown above to cut the black cardstock except I didn't use the center black piece on the card.  Instead, I cut that piece from natural color patterned paper.  It really doesn't show much on the card but makes a good background for the verse pieces that are popped up over it. I used the largest die to cut background paper to fit behind the black.  I love how easy it is to cut 2 layers - one die-cut with intricate design and other mostly solid to fit behind. Pieces of seam binding are fastened behind the vertical openings with pearls.  The oval with verse was cut with Spellbinders Hemstitch Ovals designed by Becca.  It pairs so nicely with Spun Blessings Oval! I cut the verse with oval and hemstitch dies and backed it with oval cut from black cardstock.  Pearls, a loopy bow of seam binding and a pearl stick pin finish the card.  The card is 5 x 7 inches overall with card base about 5 x 6 inches with top fold.  All patterned papers are from Graphic 45 Love Notes.

And my second project is a decorated box...


This is a paper mache box that I painted gold and dry brushed white gesso over the edges. The band is fastened to the box top only and tucks under the lid edges.  To make the band, I used only the rectangular inset die pieces to cut a strip of black cardstock.  To do that, I simply laid the dies end to end on a strip of cardstock, die cut and repeated to the length I needed.  If you look closely you can see a solid strip between the design near the small oval.  A strip of patterned paper is behind the die cut band.  The large oval is 2 pieces cut with end of largest die and curved design pieces with a solid piece cut from patterned paper behind.  I fastened them both to the box top first and fastened the band over it. The banner "tails" that extend from center oval were cut with Spellbinders Oh Happy Day and Vintage Pierced Banners. On the natural pieces (cut with Oh Happy Day), while paper was still in die, I traced around the inside of it with black marker pen. The small oval was cut with Hemstitch Ovals, top from patterned paper and under oval of black.  I added 2 buttons layered together and surrounded by pearls.  Pearls accent the banner tails as well.  I love how Spun Blessings Oval die inset design pieces can be used separately to create other designs!  Be sure to check out the other designers projects!  You'll see other ways to use this die set that are so creative and fun! 


Supply List: 
Dies: Spellbinders Hemstitch Ovals by Becca Feeken; Vintage Pierced Banners; 
Paper:   Graphic 45 Love Notes Collection; Cardstock: Black, Natural
Paint: (Box)  DecoArt® Americana® Multi-Surface Satin Muted Gold; Liquitex® White Gesso
Accessories: Pearl Stick Pin; Seam Binding; Pearls; Paper Mache Box; Buttons; Sharpie® Pen
Adhesives: 

More inspiration is just a click away.  Stop by with each Creative Team Member to see more!
We can’t wait to see what you make with these exclusive dies – be sure to post your creation on the Amazing Paper Grace Die of the Month page -------> HERE or on Instagram using the hashtag #AmazingPaperGraceClubKit


Monday, December 10, 2018

Amazing Paper Grace December Die of the Month Blog Hop


Sponsored:  As a designer for Amazing Paper Grace and Scrapbook Adhesives by 3L, I receive product to create projects.  

Good morning!!!
Today I'm bringing you inspiration for the Amazing Paper Grace Die of the Month; today is our Die of the Month Blog Hop!!   The Die of the Month is like a "swiss army knife"  you can manipulate it to do a variety of things.  At the very least you can do a card and normally you can use the pieces and parts for cards and other 3D items.  The Amazing Paper Grace Creative Team has joined in to give you their spin, in their style.  We all hope you'll see something that resonates and inspires you.

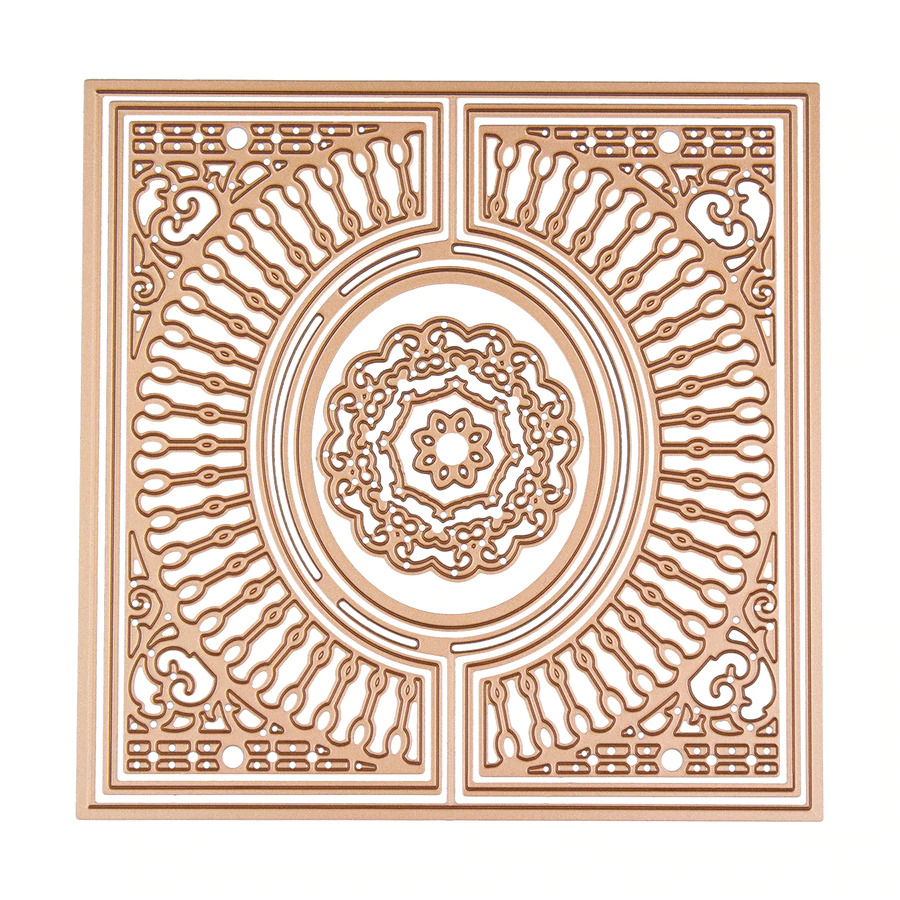
If you are new to our blogs, the Die of the Month is an exclusive die Becca has designed for Spellbinders - the December die is called Softly Spoke'n Flip and Gatefold Die.  This particular set has 9 dies and they can be used to make a background, a gatefold card, a tent card and the individual dies in the set can be used for many things.

If you want to find out more about the Club - prices, how you sign up and what's included, please look -------- HERE.
If you missed the introduction and want to know more about what inspired the Die of the Month Club, look -------HERE.
For My Project Today:


I chose to make a framed art décor piece.  Of course, this die set makes lovely cards!  I wanted to show that it can be used in other ways.  I used this beautiful die to frame a stamped image.  It makes a beautiful vintage looking framed project.   The base of my framed piece is two layers of foam core board glued together.  I glued tissue paper over it and around the edges and then painted it.  Most of the intricate die cut parts of my project are made with black cardstock.  I cut several layers of most pieces and layered them together for thickness.  I rubbed gold Gilders Paste over it and allowed some  black to show to give a vintage metal look.. It's amazing what the gold does to black cardstock! If you look at the die set pictured above, you can see the oval that's part of the intricate square is fastened to half of it.  It's easy to snip it apart to use it separately.  I used it as a mat behind the bird image. The bird oval was cut with a separate oval die that's part of the set.  The bird and branches are stamped. I painted it with inks using a water brush and added a touch of color pencil. With some of the scraps from this project, I also made a small 3 x 4.5 inches card.  I used pieces cut with the three smallest dies for the focal part.  There are actually 2 layers of the wreath shape layered together and offset slightly and rubbed with gold.  Feel free to contact me for more details. 


Be sure to check out the other blogs for more inspiration!  All the projects are amazing!!! Beautiful! Very unique designs with the same set of dies!  Blog links are listed below my supplies list.


Supplies:
Amazing Paper Grace Die of the Month: Softly Spoke'n Flip and Gatefold Die


Baroque Art Gold Gilders Paste
DCWV Vintage Memories Paper Pad
Penny Black "fragrant flowers" Stamps
Penny Black "script" Stamp
Prismacolor Pencils
Ranger Distress Vintage Photo Ink 
Ranger Distress Markers
Versafine Onyx Black Ink
Versafine Clair Morning Mist Ink
Self Adhesive Pearls
Black Cardstock
Aqua paper
Seam Binding
Gold Cord
Foam Core Board
Tissue Paper
Black paint

More Inspiration with the Die of the Month
There is much more inspiration in store for what you can use this die set for.  Just pop down the list of Creative Team Members to see more!

Visit Joanna   – joannakrog.blogspot.com
Visit Teresa   –  victorianpaperqueen.blogspot.com
Visit Ewelina -  elinaart.blogspot.co.uk
Visit Melissa  – keepsakesbymelissa.blogspot.com 
Visit Judy       – judyhayesdesign.blogspot.com
Visit Becca     – amazingpapergrace.com/blog

Thanks so much for joining us for the Amazing Paper Grace December Die of the Month Blog Hop.   We can’t wait to see what you make with these exclusive dies – be sure to post your creation on Instagram using the hashtag #AmazingPaperGraceClubKit.
                             

Sunday, November 4, 2018

Introducing Amazing Paper Grace Die of the Month Club


Good morning!!  Welcome to our inaugural blog hop of the Amazing Paper Grace Die of the Month.  Today we're here to pump you up with some inspiration for the many ways and many colors to use the Die of the Month as well as to give you the skinny on the club.  Stay tuned until the end of the post when I'll point you to the next inspiration stop in our blog hop.

What is the Die of the Month?
The Die of the Month is an exclusive die, crème de la crème, designed by Becca Feeken that are unlike previous collections.  These are the special ones, the ones that have waited for a special occasion!  What better way than to take you on a year-long ride of pleasant surprises!

Where is the Die of the Month available?
The Amazing Paper Grace Die of the Month is available through Spellbinders.  You can buy it -------HERE.

How much is the Die of the Month?
It's a large die and subscription to the club is $30.00 per month and includes US Shipping.

What's so special about the Die of the Month?
These are dies designed by Becca that are chock full of extra rims and options so that you have a huge amount of flexibility in creating more than one creation from the same set.  It's exclusive and limited, so you won't see it anywhere else and it's available until the subscription quantities are gone.

When is the Die of Month available?
The die of the month is available on the first of every month in quantities to cover subscriptions.  When it is gone, it's gone :-)

Why have a Die of the Month?
When most of Becca's dies come out they are themed collections of 12 to 14 dies.  These are the dies that are more specialized that she didn't want to build an entire collection around - they are definitely Becca's style but she's built extra functionality and thought into these sets.  You all have spoken loud and clear to say that you have a monthly budget and that you want Becca dies all year long without breaking the bank.  Well, here you go.  Don't worry, collections are not going away but streaming them out on a monthly basis you'll see one once a month and they are delightful on the budget.

Join other "Gracelets"
Once you're in, start creating!!  We can't wait to see what you make with these exclusive dies - be the first to post your creation on Instagram using the hashtag #AmazingPaperGraceClubKit

Why post?  You'll be showing Becca how you use the die so that she can fine tune upcoming months to fit your groove and you'll be inspiring everyone who looked at the die and didn't know all the possibilities - it's a community thing.

Still, need more info?  Be sure you read all the Frequently Asked Questions ------HERE.

Here's My Die of the Month Make:
This month's die is called  Christmas Village Vignette Frame Die.  If you look closely you'll notice that it looks a whole lot like the popular 3D Vignette Grand Cabinet.  That's no accident - Becca likes to make things that work together and add value to what's already in your stash.  No worries though, you don't have to have 3D Vignettes to use this die.

I made two totally different projects!  That's what I like most about Christmas Village Vignette Frame Die set, it's very versatile.  The pieces can be layered without a lot of dimension as shown in my vintage looking little book shown at top of my post.  I've colored the pieces and layered them for my Christmas scene.  To make it into a book, I used an accordion fold binding with pages cut same as the cover.
My second project, a dimensional card, is a total contrast from my book!  It shows a white wintery scene with lots of dimension.  Each layer is popped up with 3D Foam Squares.  I love all the white buildings against a starry blue sky! 


More Inspiration
There is much more inspiration in store for what you can use this die set for.  Just pop down the list of Creative Team Members to see more!

Visit Joanna   – joannakrog.blogspot.com
Visit Teresa   –  victorianpaperqueen.blogspot.com
Visit Melissa  – keepsakesbymelissa.blogspot.com 
Visit Judy       – judyhayesdesign.blogspot.com
Visit Becca     – amazingpapergrace.com/blog

Hop along with us every month as a new die of the month is revealed.  The line up is pretty awesome!

Thanks for stopping!

Judy