Showing posts with label Imagine Crafts. Show all posts

Wednesday, September 13, 2023

Autumn Leaf Card

 Hello Friends!


I posted this card on Scrapbook Adhesives by 3L Blog today.  This card makes a bold statement and is easy to make.  
The leaf is stamped with Distress Archival Ground Expresso, clear heat embossed and then colors of Distress inks sponged over it. 


I stamped the same leaf stamp with Distress Antique Linen ink to make the background. 


"Autumn" and verse are stamped with Versafine Black Onyx ink. For the verse, I stamped off the ink on scrap paper once before stamping on card to make it slightly less bold. 

Card size is 4.25 x 5.75 inches

You can see more details with step out photos and directions HERE.

Happy Crafting!

Judy


Materials Needed:
Scrapbook Adhesives by 3L®

E-Z Dots® Permanent Refillable Dispenser

Thin 3D Foam Squares White Mix

Other: Stamp: Heidi Swapp (October Quotes), Stampers Anonymous (Tim Holtz Sketchy Leaves); Ink: Ranger Ink (Distress Archival Ground Espresso, Distress Abandoned Coral, Antique Linen, Carved Pumpkin, Broken China, Twisted Citron, Clear Embossing Powder); Imagine Crafts/Tsukineko (Versafine Onyx Black); White, Dark Brown, Saw Grass Cardstock

Monday, December 10, 2018

Amazing Paper Grace December Die of the Month Blog Hop


Sponsored:  As a designer for Amazing Paper Grace and Scrapbook Adhesives by 3L, I receive product to create projects.  

Good morning!!!
Today I'm bringing you inspiration for the Amazing Paper Grace Die of the Month; today is our Die of the Month Blog Hop!!   The Die of the Month is like a "swiss army knife"  you can manipulate it to do a variety of things.  At the very least you can do a card and normally you can use the pieces and parts for cards and other 3D items.  The Amazing Paper Grace Creative Team has joined in to give you their spin, in their style.  We all hope you'll see something that resonates and inspires you.

If you are new to our blogs, the Die of the Month is an exclusive die Becca has designed for Spellbinders - the December die is called Softly Spoke'n Flip and Gatefold Die.  This particular set has 9 dies and they can be used to make a background, a gatefold card, a tent card and the individual dies in the set can be used for many things.

If you want to find out more about the Club - prices, how you sign up and what's included, please look -------- HERE.
If you missed the introduction and want to know more about what inspired the Die of the Month Club, look -------HERE.
For My Project Today:


I chose to make a framed art décor piece.  Of course, this die set makes lovely cards!  I wanted to show that it can be used in other ways.  I used this beautiful die to frame a stamped image.  It makes a beautiful vintage looking framed project.   The base of my framed piece is two layers of foam core board glued together.  I glued tissue paper over it and around the edges and then painted it.  Most of the intricate die cut parts of my project are made with black cardstock.  I cut several layers of most pieces and layered them together for thickness.  I rubbed gold Gilders Paste over it and allowed some  black to show to give a vintage metal look.. It's amazing what the gold does to black cardstock! If you look at the die set pictured above, you can see the oval that's part of the intricate square is fastened to half of it.  It's easy to snip it apart to use it separately.  I used it as a mat behind the bird image. The bird oval was cut with a separate oval die that's part of the set.  The bird and branches are stamped. I painted it with inks using a water brush and added a touch of color pencil. With some of the scraps from this project, I also made a small 3 x 4.5 inches card.  I used pieces cut with the three smallest dies for the focal part.  There are actually 2 layers of the wreath shape layered together and offset slightly and rubbed with gold.  Feel free to contact me for more details. 


Be sure to check out the other blogs for more inspiration!  All the projects are amazing!!! Beautiful! Very unique designs with the same set of dies!  Blog links are listed below my supplies list.


Supplies:
Amazing Paper Grace Die of the Month: Softly Spoke'n Flip and Gatefold Die


Baroque Art Gold Gilders Paste
DCWV Vintage Memories Paper Pad
Penny Black "fragrant flowers" Stamps
Penny Black "script" Stamp
Prismacolor Pencils
Ranger Distress Vintage Photo Ink 
Ranger Distress Markers
Versafine Onyx Black Ink
Versafine Clair Morning Mist Ink
Self Adhesive Pearls
Black Cardstock
Aqua paper
Seam Binding
Gold Cord
Foam Core Board
Tissue Paper
Black paint

More Inspiration with the Die of the Month
There is much more inspiration in store for what you can use this die set for.  Just pop down the list of Creative Team Members to see more!

Visit Joanna   – joannakrog.blogspot.com
Visit Teresa   –  victorianpaperqueen.blogspot.com
Visit Ewelina -  elinaart.blogspot.co.uk
Visit Melissa  – keepsakesbymelissa.blogspot.com 
Visit Judy       – judyhayesdesign.blogspot.com
Visit Becca     – amazingpapergrace.com/blog

Thanks so much for joining us for the Amazing Paper Grace December Die of the Month Blog Hop.   We can’t wait to see what you make with these exclusive dies – be sure to post your creation on Instagram using the hashtag #AmazingPaperGraceClubKit.
                             

Sunday, October 14, 2018

Thursday, September 27, 2018

Cool Penguin Card with Stampendous and Scrapbook Adhesives by 3L

Sponsored:  I'm a designer for Scrapbook Adhesives by 3L and receive product to use for projects.

Stampendous! and Scrapbook Adhesives by 3L have paired for a Holiday Blog Hop this week!  Lots of inspiration on both blogs. Here are links for all the days:

Lots  of  inspiration on Stampendous! Blog as well!

*   *   *

Today, I have a Cool Penguin Card on Scrapbook Adhesives by 3L Blog


Here are a few step out photos and directions:

- Start with white 4.25 x 5.5 inch card base.
- Cut purple and lavender mats
- Press edges of lavender mat on watermark ink pad.  Apply Stampendous©!  Detail Gold Embossing Powder to edges and heat to emboss. Do Not stamp with snowflakes first as photo shows!  Gold embossing powder will stick to snowflakes - lesson learned!  Of course, that could be a very cool background as well!


- Repeatedly stamp snowflakes on lavender paper with watermark ink.
- Stamp verse on white cardstock with black ink. Trim to size
- Cut purple mat for verse.
- Assemble purple and lavender mats to card front and verse to purple mat using E-Z Dots® Permanent Refillable Dispenser .


- Freehand cut snowbank from white cardstock.  Shade with watercolor markers


- Stamp penguin, hat and sweater from Stampendous©! Cool Penguin Stamps and Cutting Dies set on white cardstock with watermark ink.  Heat emboss with Stampendous©!  Detail Gold Embossing Powder .  
- Use dies from Stampendous©! Cool Penguin Stamps and Cutting Dies set to cut out penguin, hat and sweater.
- Use watercolor markers to color hat, sweater and penguin
- Attach sweater to penguin with Thin 3D Foam Squares White Mix
- Attach hat along bottom edge with E-Z Runner® Micro Refillable Dispenser.  The narrow adhesive works so well along the edge!


- Fasten snowbank to card with Thin 3D Foam Squares White Mix in center.  Use E-Z Dots® Permanent Refillable Dispenser to apply adhesive at ends


- Use Thin 3D Foam Squares White Mix to fasten penguin on areas that are above snowbank.  Use E-Z Runner® Micro Refillable Dispenser  at bottom edge where penguin is over snowbank.
- Fasten matted verse with Thin 3D Foam Squares White Mix


Enjoy a Cool Penguin Card!

Happy creating! 
judy


Materials Used:


Other Supplies: Watercolor Markers, Black Ink, Watermark Ink, Cardstock: White, Lavender, Purple

Monday, September 17, 2018

Noel Ornament Holiday Card

Today, I'm showcasing a new die from Amazing Paper Grace,  Charming Round Tag, on this Noel Ornament Holiday Card.  I've also used
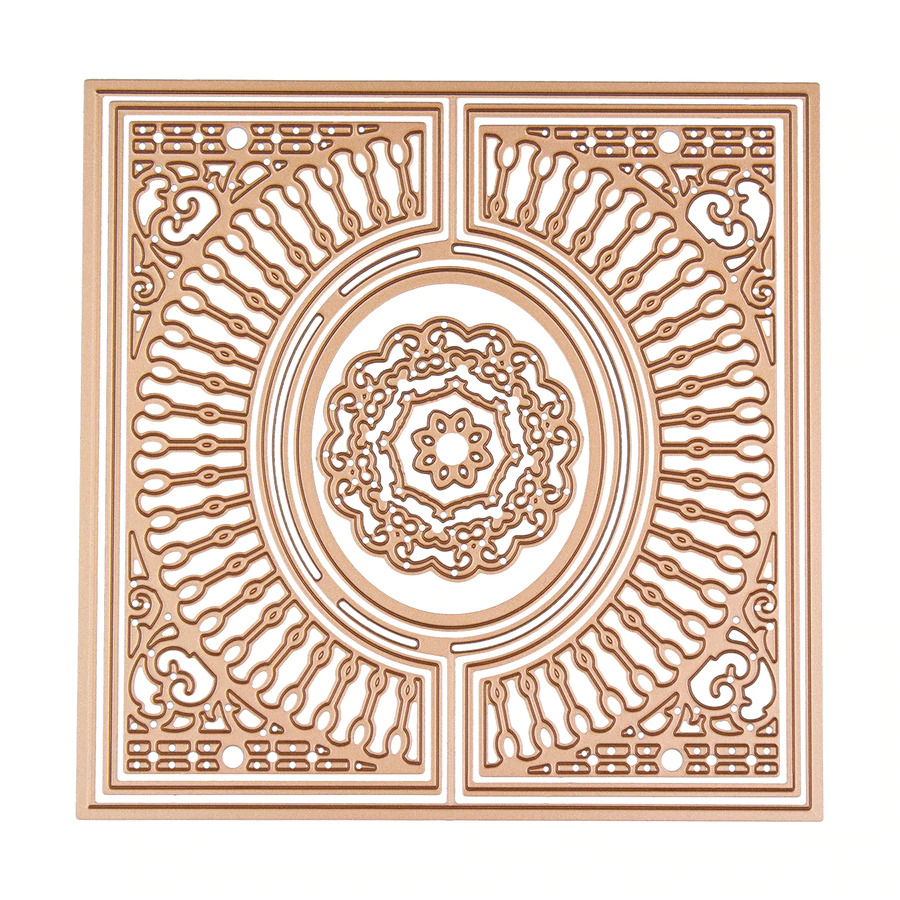
 Grand Dome 3D  dies.


When I finished this card, I wasn't really fond of it...… I'm liking it much better now!  It often helps me to walk away from a project for awhile, maybe even a day, and then look at it.  Sometimes I see something that needs to be changed, other times I see how good it looks. This card takes me out of my "box" a bit as it more glitzy than I usually make. A good thing to step out of my box!!!

I made the ornament first and designed the card around it.  I cut a round tag of teal cardstock for the base using the tag die from Charming Round Tag.  Then I cut gold foil paper with the same die with Noel insert at top and scroll design piece at the bottom.  The inserts for this die set are half round pieces and interchangeable. I also cut the ornament top piece from gold.  I used E-Z Runner® Micro Refillable Dispenser along the edges to fasten the gold to teal.  Across the center I added a piece of teal ribbon and 2 pieces of gold braid and wrapped the ends to the back. I used E-Z Runner® Ultra Refillable Dispenser to fasten ribbon and all ends in back and the  E-Z Runner® Micro Refillable Dispenser to fasten the braid. I then set it aside to make the card.

The basic shape of the card was cut with Grand Dome 3D Card out of cream color cardstock.  To do that, I placed a folded piece of cardstock (slightly bigger than Grand Dome 3D outer die) against but not over the cutting edge of die so the fold edge would not be cut.  I taped it place and cut the shaped card.  I cut off the tabs.  Next I cut teal cardstock with outer, scroll insert and inner circle dies from 
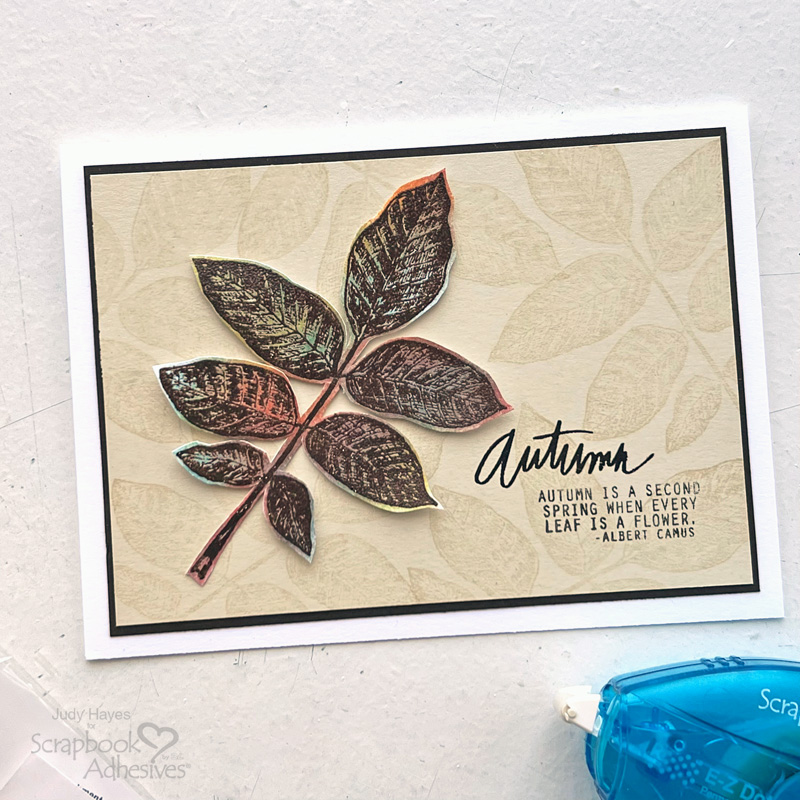
Grand Dome 3D Card.  After that I decided to put script stamping behind the ornament so I cut a mask using Grand Dome 3D Card outer die and circle.  I laid that over the card front and stamped over it with Penny Black Script stamp and Versafine Clair Twilight ink that was stamped off once.  Voila, the script is only in the circle area.  I sponged on a little color around the edges with Distress Peacock Feathers ink and also rubbed some over the scroll area.  
Then I got the idea to rub the same ink over the ornament.  I really didn't like the look of the white edges on the gold paper on Noel and scroll design so I sponged ink over and rubbed it in well.  Yes, the gold part got ink on it!  I simply wiped it off with a paper towel after misting it lightly with water. The ink didn't stick to the gold paper as it has such a shiny finish.


The ornament is fastened to the card with Thin 3D Foam Squares White Mix.  I fastened a bow of teal and gold ribbon on top with Adhesive Dots Medium. The final touch is a few gold rhinestones on ornament and card. 


Thank you so much for visiting! I hope you've found some inspiration here!

Judy

Materials Used:

Amazing Paper Grace Dies by Becca Feeken:
Charming Round Tag S4-962


Other Supplies: Imagine Crafts/Tsukineko Versafine Clair Twilight ink, Distress Ink Peacock Feathers, Penny Black Script stamp, Want2Scrap Gold Rhinestones,Teal Cardstock, Cream Cardstock, Gold Foil Cardstock, Ribbon, Gold Braid,

Sunday, July 29, 2018

Clothed in Strength Card with Hemstitch Rectangles


Sponsored:  As a designer on the Amazing Paper Grace Creative Team, I am provided dies to create projects. I'm also a designer for Scrapbook Adhesives by 3L and receive product from them.

I chose a verse from Rubbernecker Stamps for my card today, Clothed in Strength.  I really like the mix of fonts.  I also used Amazing Paper Grace dies: Trefoil Crest and Hemstitch Rectangles.  


Here are the directions...


Thank you so much for visiting!
Judy


Materials Used:

Amazing Paper Grace Dies by Becca Feeken:
S4-927 Trefoil Crest
S5-308 Hemstitch Rectangles

3D Foam Squares – White Mix
Adhesive Dots Medium
E-Z Dots® Permanent Refillable Dispenser
E-Z Runner® Ultra Refillable Dispenser

Other Supplies:  Bazzill Vanilla; Photo Play Paper Audubon; Imagine Crafts/Tsukineko Versafine Onyx Black ink; Rubbernecker Stamps –She is clothed; Pearls; Burgundy Cardstock; Shimmer Ribbon