Showing posts with label Spellbinder Design Team. Show all posts

Friday, August 22, 2014

My day on Spellbinders 12 Days of Christmas Blog Hop

Saturday, August 23rd, is my day to reveal a new holiday die set on the Spellbinders blog!

http://www.spellbinderspaperarts.com/Community/Blog.aspx
Click here to go to Spellbinder's blog post.

I've created 6 cards from the pieces from one die cut just once!  The ribbon on the photo above shows one of the words from the die.  I love the vintage look of the those letters!

 
Here's a little peek at those letters on a card.  I'll share the technique I use to create the glitter band with the letters on the Spellbinders blog post.  And don't forget to enter for a chance to win some of the new Holiday dies!!! 
 
Happy creating!
judy

Thursday, August 7, 2014

Spellbinders Announcement

Finally.......I can share the news!!! 
I've been selected to be on the Spellbinders Design Team for 2014-2015!   What a great honor to be chosen again!!!    Thanks Spellbinders!!!  You rock my world!

Spellbinders is announcing members of the new Design Team on the blog this week and next.  Each day a designer is featured.  Today is my day!  You can see the blog post here.

I chose a few of my favorite Spellbinders projects to share today. Some you may have seen, some may be new.

This is one of my all time favorite scrapbook pages. 


I created this layout for my final round to make the DT in 2010, my first year on the team.  The assigned dies were a Film Strip and Inverted Scalloped Circles.  Can you find those shapes?

This is another favorite page.......the photo was my inspiration! 

 
I freehand cut a tree trunk to fit along the edge of the page and added many, many die cut leaves! 

Of all the handmade books I've made.......


 .......my Sprocket Journal is one my favorites.

My Blue Green Goddess was created with the Jewels Goddess die.  This was a fun project! 

 
Lots of inks and mists, canvas, ribbon, tulle, foil,wire and gems!  Everything I like to play with! 


 Bronze Angel is new to my blog!  This was another project that was fun to create.  Although she looks bronze, all the metal is actually aluminum.  I added various paints, inks and DecoArt Metallic Lustre to get the bronze color.  She has fabric sleeves and peplum.  She holds a tiny fabric bird in a nest of wire.  Product details can be found on Spellbinders website here. If you'd like to know more details, add a comment asking and I'll post more another time.

Thanks for visiting project memory lane with me! 

I'm looking forward to an awesome year with Spellbinders!  One can only guess what new and exciting products will be released this year! 

Thanks for stopping by! 

Happy creating!
judy
Tuesday, December 17, 2013

Seuss Falls Scrapbook Page

Hello blog friends! 

I decided to take a few minutes to post something!  I've got oodles of things to do but this seemed like a good choice for my time right now!!!

This is a scrapbook page I created as a Spellbinders project back in July.  In August, I moved to the Mixed Media DT and haven't done a scrapbook layout since.  I never thought I'd say this but I do miss doing layouts just a little bit!!!  (I should qualify that!  I can still do layouts on the MM DT but it's not a requirement now.)

 
The photos are of my grandson Logan.  Last spring, we visited a Dr. Seuss exhibit in Sioux Falls, SD hence the title "Seuss Falls".  Logan had fun posing next to the bronze statues. 
 
I used several Spellbinders Die D-Lites on this page.  The corner scroll pieces: Corner Flourish; the piece that looks like a sign on the side: Mirror, Mirror; and the small frames layered over the photos and framing the small photo: ATC
 
The color combination is what I like best on this page! The red just pops against the blue!   Besides the photos of Logan, of course!
 
You can see this in the Spellbinders Idea Gallery HERE.

Supplies:

Thanks for visiting!!! 
Stay tuned for a post on the 20th for sure.  I have a project on the Quietfire Design Blog as a guest designer.  I'll post a sneak peek here and link the their post.

Happy Creating!
Judy

Thursday, August 1, 2013

A Book Created for Spellbinders CHA Class

Good Morning Blog Friends!

Today is my first day on Spellbinders new Mixed Media and Jewelry Design Team!!!  I'm really excited about this new venture.

At the same time, I'm a bit sad that my three plus years on the Spellbinders Design Team has ended. Yesterday was my last official day on that team. 

I'm looking forward to new challenges!  Mixed Media is a perfect fit for me!!! 


Here's a fun mixed media book that I created for one of Spellbinders' classes taught at CHA last week.  It was fun to be at the class and see the attendees put together their own version of this book! It was a lot to do but I think they all enjoyed the class!


The journal is covered with black fabric with faux stitches made with a Elmer's Painters white marker.  Brightly colored flowers, butterfly, birds and a birdhouse are glued to the cover.  The birds and butterfly are Spellbinders blanks from the Media Mixage line.  I've painted them white before adding StazOn ink for color.  The flowers are all cut from Roc-lon fabric.  It takes color so well and does not fray!  To cut the fabric, I've used a new metal shim from Spellbinders that makes cutting most fabrics easy!  All the flowers were colored with StazOn inks sponged onto the fabric.  The bird  house is one of the new hatpins revealed at CHA.  It makes a cute birdhouse with an aluminum roof, don't you think?!?
Along with the book is a jewelry piece pinned onto the book ties.  The bird and house are blanks.  The flower is cut from fabric.  The art words are from Cosmo Cricket "Life" Tiny Text sheet.


  This was such a fun project to put together! 


Happy creating!
Judy

Tuesday, January 8, 2013

A Scrapbook Page for Dad

Hey everyone!!!
 
Shock of shocks, I'm posting something!  I know I've been pretty remiss........ sorry.  I've been way busy and this got pushed to the end of my priority list.  I'm hoping to do better for 2013!
 
Tonight, I've been packing for CHA!  I'm excited to be heading to Anaheim tomorrow.  I'll be working in the Spellbinders booth.  Lots of work and also exciting.  This year Spellbinders is sponsoring a class for CHA.  I'll be helping with that on Friday as well as a couple other classes.  I really like helping with the classes.  I love helping others learn.  The most exciting part.....I put together the project that will be used for the class!!!!  so awesome!  I must give credit to two very talented DT members who helped with the project: Tina and Christine.  We each created a project.  Then I took bits and pieces from each project and pulled it all together.  I'll share once the class is over!  (if I can that is, I best check on that!)
 
So I pulled out a Spellbinders project to share with you today.   This is scrapbook page I created for my Dad.  All the patterned paper strips were embossed in various folders. Then I rubbed ink over the embossed pattern to highlight the raised areas.  All the strips were tan cardstock.  This is an easy technique, especially with any dye ink pad that has a hard surface.  I don't mind a little distressed look so if a bit of the ink strays beyond the embossing, it's okay!
Between each of the wide strips are narrow dark red strips that I also inked.  The effect is much more subtle with a matching color ink.
 
I had to add a touch of blue on the page to bring out the blue of Dad's eyes. I've inked the edges a bit.  I added journaling strips on blue across the bottom of the page.  I found some old buttons to add to the strips pulling out one blue and one red button.  A tag with "Love you, Dad" is the simple title. 

You can find this scrapbook page in the Spellbinders Idea Gallery here!

thanks to all you loyal friends for not giving up on me!!!! 

Happy crafting!
-judy
 
 
Supplies:
Spellbinders: 
•S4-322 Grommet Tags
•S5-029 Nested Lacey Pennants
•LF-126 Grand Squares
•ES-003 Valor
 •ES-004 Whimsy
•ES-006 So Trendy
 •EL-002 Regal
 •EL-003 Patchwork
•EL-004 Imperial
 •EL-006 Mystic
•Spellbinders Grand Calibur® Die Cutting and Embossing Machine
 •My Mind's Eye, Lost and Found Christmas Merry Patterned Paper
•Bazzill Basics Paper, Prismatics Tawny Medium Cardstock, Rain, Wine Cardstock
 •Clearsnap, ColorBox Mudslide Archival Dye Ink
 •Cosmo Cricket, Tiny Type Red Letter Stickers
 •Buttons Galore And More, Natural Buttons
 •Scor-Pal, ½" Scor-Tape
 •Glue Dots, Glue Dots
•SCRAPBOOK ADHESIVES BY 3L, 3D Foam Squares, E-Z Runner
Other Supplies: Off White Cardstock; Raisin Alcohol Ink; Brown Dye Ink; Chipboard Letters; Black Marker; Brown Buttons; Tan Pearl Cotton Thread/Cord

Thursday, August 2, 2012

"My Dream" Scrapbook Page

Today, I have a scrapbook page to share.  This was one of my Spellbinders projects last fall.  This layout expresses  my dream come true to be on the Spellbinders Design Team!  


I used my Spellbinders' last year DT photo as well as the photo from my first year on the Spellbinders DT.  The bigger photo was taken by Allison Tyler Jones Photography.  It's one of my very favorite photos of myself!

The photo of the layout really does't do justice to all the copper on this page.  I've used embossed copper tape along the left side of my photo.  The words along the right side are cut from Royal Langnickle copper Etchboard.  I love that product for embossing.  It's black over a metallic color.  Once it's sanded the metal color is revealed.  It worked beautifully for the Donna Salazar words from her Spellbinders set S5-084 Girlie Grunge Labels.  There's more copper below the photos.  That is copper tape over card stock.  I've cut it with Spellbinders Edgeabilities E8-004 Classic Ric Rac and E8-003 Classic Triple Scallop with a flower Decorative Insert from E8-014 Classic Decorative Inserts Six.

Along the left side of the page are small photos of some of my favorite Spellbinders projects.  I chose to print all the photos in Sepia.  The papers on the page are all neutral brown tones with the copper thrown in for accent. 

I hope you enjoy my sharing of my dream!  If you haven't tried to cut craft foil and emboss it with your Spellbinders die templates, you really need to try it!!! The results are always so stunning!

Thanks for visiting!

Have a super creative day!

-judy


Thursday, February 24, 2011

Did you hear the news?


Woohoo!!!  I made the Spellbinders Design Team for 2011!!!
The annoucement was made earlier today on the Spellbinders blog!   I'm so excited to be on the team a second year!  What an adventure this past year has been!  Lots of challenges, a few stressful months, lots of projects and wonderful memories!  Three of the new DT were with me this year, AJ, Latisha, and Kimberly.  I'll meet the rest of the team at a retreat in Arizona in April.    

Now that the news is out I can share my first round project with you.  I had the option to create a card, scrapbook layout or something altered.  I chose "altered".  My thoughts were that "cards are easy for me, a layout the hardest so I'd do altered first".  I expected we would be asked to do a layout in the final round anyway.......that is if I made it that far.  That's history!

I created this journal.....

I started with chipboard for the covers.  I applied adhesive with my Xyron and then laid crinkled tissue paper over the adhesive.  It was pink!  Lots of layers of Glimmer Mist changed the color.  The vine was cut with a Spellbinders die template.  I kept the die template in place for some of the misting to get the two tone color on the leaves.   The butterflies are cut from actual copper craft foil that has been adhered to card stock.  The paper backing really strengthens the copper. 
Real copper will change colors when super heated.  I used my heat gun (takes quite awhile to get hot enough!) to heat them until I liked the color change.  You can see it best on the biggest butterfly. 


I used Glimmer Mist on the inside cover, too, only copper color.  I added a verse from Artistic Outpost's Happiness set......so appropriate with my butterflies!  The edges of the inside pages are distressed and then sprayed with Tattered Leather Glimmer Mist.  You can see it in the next photo.    I added seam binding to use as a marker, again sprayed and rolled in Glimmer Mist.  I keep a whole roll of white and beige seam binding to color as I need. 

The butterfly dangles are 2 die cut copper butterflies that have been embossed over Spellbinders 12-1006 Floral and Stone Impressabilities.  Each dangle is 2 butterflies fastened over an eye pin and held together with red line tape and glue.  I added a bead to the end of the eye pin and curled it shut.  There's another eye pin at the top with a bead and loops to fasten to the seam binding.  These dangles are my favorite part of this journal! 

I used my Zutter Bind-It-All to make the holes and add the coil binding.  I even used a copper metallic marker to add touches of copper to the binding.....it needed to match the journal!  I sprayed the whole journal  with clear finish to protect the color. 

Thanks for stopping!  I had a bit of break from posting the past few weeks.  I hope to get back to posting more often now.  I'm planning to share some great Spellbinders projects throughout the year!!!

-judy

Saturday, April 24, 2010

Coloring Exercise

Can you believe it? I haven't done any stamping since I got back from the Spellbinders Retreat last Sunday night!  I think I have "stampers block"!  I'm hoping to get over it this weekend........hasn't happened yet but I still have tonight and Sunday to go!
In the meantime, I have a coloring exercise to share that I did at the Spellbinders Retreat last week. We were privileged to have Marianne Walker from Copic speak to us on Saturday.  She is a very talented artist as well as a Copic instructor. 
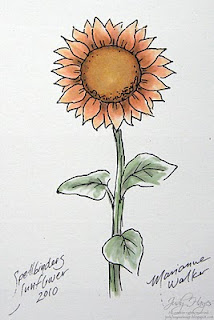
When she suggested this coloring exercise, she asked if we could each stamp something to color.  Well, this was Saturday afternoon.  We were all leaving early on Sunday.  We had all packed our stuff!  No one had any stamps or ink.  So with just a little encouragement from all of us, she sat down and drew a sunflower for us to color.  After a quick trip to the hotel business center to make copies, we were set to color.
.....this photo shows the sunflower taking shape.....
We each had 2 sunflowers to color and we were each given 2 letters of the alphabet.  We were to choose a word starting with one of the letters showing feeling or emotion, write it down and tuck it away.  Then, out came the Copics.  We were free to color one sunflower any way we liked.  The 2nd flower was to be colored depicting the word we had written down.


......here Marianne puts the finishing touches on her creation with her signature and a title.....
Everyone was so quiet once we started coloring. How relaxing it was!


Here's my first sunflower.  I chose to make it more orange than a traditional yellow sunflower.


This is my 2nd flower.  I chose a word starting with "R" to influence my color scheme.  Can you guess what the word was? What kind of emtion does this color portray versus the color of my first flower?

My word was "restful".  I chose softer pastel colors to portray that emotion.  Do you think it seems more restful than the orange one?

It was so interesting to see what the rest of the DT did with their sunflowers.  I wish I'd taken a photo of all of them on the table.........but I didn't.  Marianne laid them all out on a table and talked about each set of flowers commenting on techniques and colors used to portray each word.  There was a very wide variety of colors and styles.  Each one unique!
Here you can compare them side by side.....

It was a fun exercise.  Color does make a difference in the emotion or mood portrayed.


Margie just sent me this photo of all the DT sunflowers!!! Thanks, Margie! ...so you get to see all the flowers after all!
Margie is on the Spellbinders Blog Team. We met at the Retreat.  She's so fun!  And as you can see, she always had her camera!
                                         (added April 25, 2010)

Hope you enjoyed this little exercise!

Happy coloring!
-judy