Showing posts with label Clearsnap. Show all posts

Thursday, May 9, 2013

Flowers Feed the Soul Journal

No jewelry in this post but I did use more Spellbinders Media Mixage™ products!
 
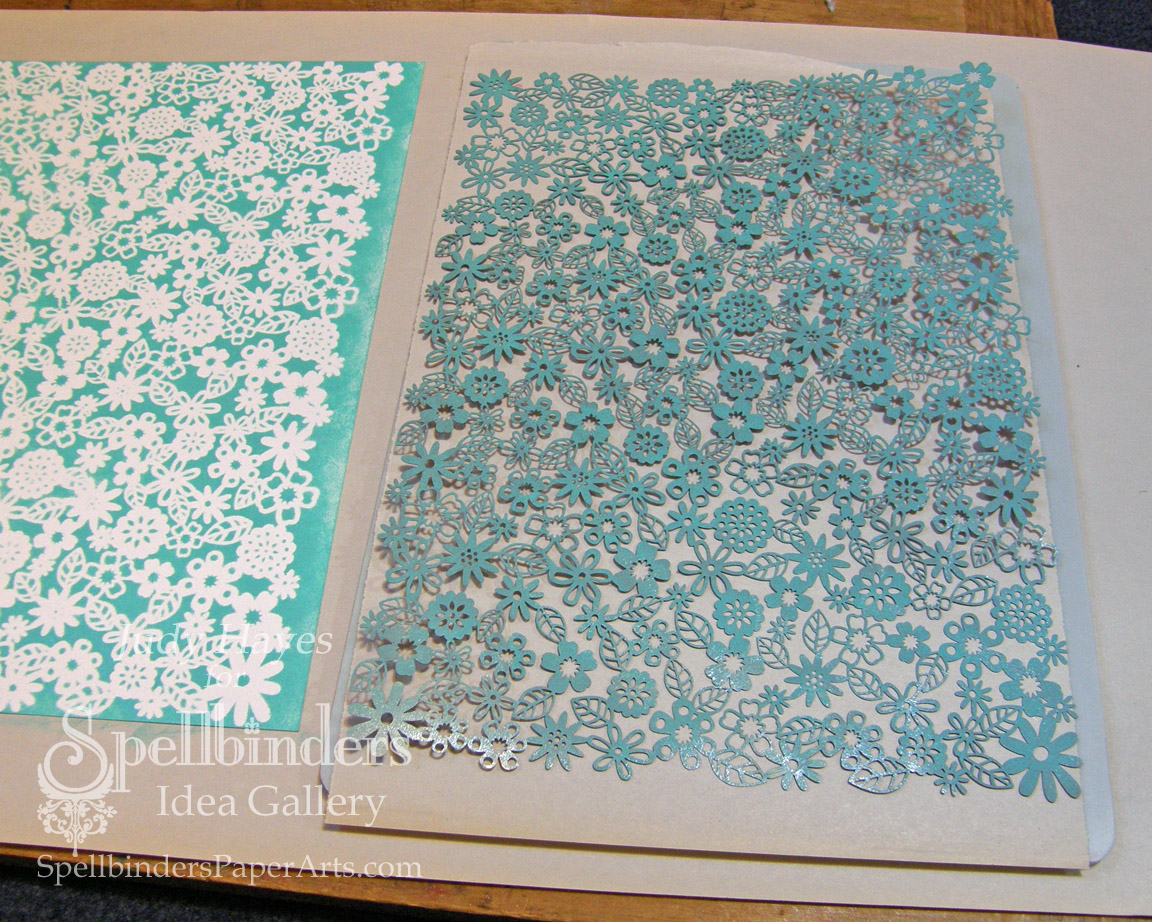
This is a project I did for Spellbinders.  You can find it on their website here.  There's even a link to download the instructions.
 
My inspiration was to make a garden journal.  A place for notes about  anything gardening!  Since I made the journal with my Bind-It-All machine, I added envelopes as dividers between the pages. A spot to tuck in a seed packet or info about a new plant.  
 

The aqua flower inside the dark blue flower is a Spellbinders blank from MB6-004 Flowers One.  There's another one peaking out from under the pink flower. The blanks are gold color.  I used ink to color it with clear embossing powder over it.  The other flowers are paper, inked and clear heat embossed.  I used MD2-004 Flowers One matching set of dies to cut
those.
The label was cut with another Media Mixage die, MD2-001 Frames One.  I inked through the die and then stamped the verse.

The butterfly is the larger blank from MB6-008 Butterflies One.  I used the matching die set, MD2-008 Butterflies One to cut the paper for the wings.  The paper is white cardstock colored with pigment inks and clear heat embossed. There's a touch of gold embossing powder sprinkled over top and heated into the clear.  I hand cut a piece of paper to make the "body" of the butterfly and glued it to the blank.

For more info and the full directions, you can find the download here.

Happy Crafting!
-judy

 Supplies:

Thursday, March 21, 2013

Nesties Besties Blog Hop

Good Morning!!!! 

Today, I have a special treat for you!  Some of the Spellbinders Design Team are hosting a blog hop - The Nesties Besties Blog Hop!  We are each showcasing one of our Spellbinders projects from the Idea Gallery.  You'll find lots of inspiration!  Lots of Spellbinders products, too!!!!   Even some blog candy!!!! 

Here are links to the other design team members who are participating:


I chose my Flowers Feed the Soul Journal to show today! 

This journal features some of the Media Mixage blanks and matching die templates.  You can find downloadable directions for this book on Spellbinders website here.  I'm not going to repeat all the directions since they are available to download.


The butterfly is a metal blank from SPellbinders Butterflies One blank set.  It has paper pieces glued to the wings.  I  cut the paper with the Sellbinders die template:   Spellbinders™ Butterflies One which matches the blank set.  To add color,  I've applied pigment ink and heat embossed it with clear.  I sprinkled a touch of gold embossing powder over top and heated it.
 
 
The little paper flowers were cut with Spellbinders™ Flowers One die template set.  Two of the flowers are metal blanks: one is peaking out from under the pink flower and the other is the center aqua flower on the big blue flower.  It's colored with ink and heat embossed with clear.  These are part of the set Spellbinders™ Flowers One blanks set. 
 
I've also used a Media Mixage die template set for the verse label - Spellbinders Frames One.  I inked through the die to add the shading around the edges.  The verse is from Flourishes stamp set "From the Garden".
 
 The background rectangle and frame were cut with Spellbinders™ S5-171 A2 Round Corner Basics A.  I used 2 dies nested together to cut the frame.  The frame has been embossed with
M-Bossabilities So Trendy.   I stamped a branch from Penny Black's "A Wish for Peace" clear set with black ink, and then added nail polish to the dots on the branches.   I stamped the same branch on the book cover.
 
The journal itself has chipboard covers covered with light Kraft packing paper and designer paper on the inside. I added My Mind's Eye paper to the outside of the covers.  Inside, there are pages for notes and sketches as well as envleopes that divide the paper sections and add a place to tuck seeds and garden notes.   


Blog Candy GIVEAWAY!!!
 
I have a set of Spellbinders™ S5-171 A2 Round Corner Basics A (without packaging) to give away!!!!  Just leave a comment for a chance to win.
I'll use Random Number Generator to choose a winner a week from today.  Please leave your email address so I can contact you or check back next week!  Good luck!
 
 
If you have any questions, feel free to email me. 
 
Thanks so much for stopping!  Have a creative day!!!
-judy
 
 
Supplies:
Spellbinders™ GC-001 Grand Calibur® Machine


Penny Black® Inc – 30-136 A Wish for Peace
Flourishes – 88 “From the Garden”
Clearsnap – Colorbox Dye Archival Wicked Black, Watermark Ink, Colorbox Pigment Ink Queue -
Deep Sea, Night Sky
Bazzill Basics Paper® - Velvet
Basic Grey “Plumeria” – Cleopatra, Moonstone, Yellow Wallpaper
Xyron 900 and permanent Adhesive
Scor-Pal® Scoring Board
Scor-Pal® - Scor-Tape ¼”, ½”
Sparkle N Sprinkle Clear Embossing Powder
SCRAPBOOK ADHESIVES by 3L – 3D Foam Squares ¼” white
Elmers Glue Spots – Small thin
Creative Impressions Sheer Ribbons – purple, yellow, pink
Zutter Bind-It-All and 1” Bronze O-Wire
Card stock – white, dark purple
Text weight paper
Kraft envelopes – 3 - 5 x 7”
Purple marker
Ranger Distress Milled Lavender
Ranger Adirondack Lights – Wild Raspberry
Lightweight Chipboard
Lightweight Kraft paper sack
White Craft Glue 

Tuesday, January 8, 2013

A Scrapbook Page for Dad

Hey everyone!!!
 
Shock of shocks, I'm posting something!  I know I've been pretty remiss........ sorry.  I've been way busy and this got pushed to the end of my priority list.  I'm hoping to do better for 2013!
 
Tonight, I've been packing for CHA!  I'm excited to be heading to Anaheim tomorrow.  I'll be working in the Spellbinders booth.  Lots of work and also exciting.  This year Spellbinders is sponsoring a class for CHA.  I'll be helping with that on Friday as well as a couple other classes.  I really like helping with the classes.  I love helping others learn.  The most exciting part.....I put together the project that will be used for the class!!!!  so awesome!  I must give credit to two very talented DT members who helped with the project: Tina and Christine.  We each created a project.  Then I took bits and pieces from each project and pulled it all together.  I'll share once the class is over!  (if I can that is, I best check on that!)
 
So I pulled out a Spellbinders project to share with you today.   This is scrapbook page I created for my Dad.  All the patterned paper strips were embossed in various folders. Then I rubbed ink over the embossed pattern to highlight the raised areas.  All the strips were tan cardstock.  This is an easy technique, especially with any dye ink pad that has a hard surface.  I don't mind a little distressed look so if a bit of the ink strays beyond the embossing, it's okay!
Between each of the wide strips are narrow dark red strips that I also inked.  The effect is much more subtle with a matching color ink.
 
I had to add a touch of blue on the page to bring out the blue of Dad's eyes. I've inked the edges a bit.  I added journaling strips on blue across the bottom of the page.  I found some old buttons to add to the strips pulling out one blue and one red button.  A tag with "Love you, Dad" is the simple title. 

You can find this scrapbook page in the Spellbinders Idea Gallery here!

thanks to all you loyal friends for not giving up on me!!!! 

Happy crafting!
-judy
 
 
Supplies:
Spellbinders: 
•S4-322 Grommet Tags
•S5-029 Nested Lacey Pennants
•LF-126 Grand Squares
•ES-003 Valor
 •ES-004 Whimsy
•ES-006 So Trendy
 •EL-002 Regal
 •EL-003 Patchwork
•EL-004 Imperial
 •EL-006 Mystic
•Spellbinders Grand Calibur® Die Cutting and Embossing Machine
 •My Mind's Eye, Lost and Found Christmas Merry Patterned Paper
•Bazzill Basics Paper, Prismatics Tawny Medium Cardstock, Rain, Wine Cardstock
 •Clearsnap, ColorBox Mudslide Archival Dye Ink
 •Cosmo Cricket, Tiny Type Red Letter Stickers
 •Buttons Galore And More, Natural Buttons
 •Scor-Pal, ½" Scor-Tape
 •Glue Dots, Glue Dots
•SCRAPBOOK ADHESIVES BY 3L, 3D Foam Squares, E-Z Runner
Other Supplies: Off White Cardstock; Raisin Alcohol Ink; Brown Dye Ink; Chipboard Letters; Black Marker; Brown Buttons; Tan Pearl Cotton Thread/Cord

Saturday, August 25, 2012

Goddess Jewelry Holder

Today, I posted this Goddess Jewelry Holder on Julianna's Positively Me blog.


You can find all the details there including directions and photos!  Plus a supply list!


This is one of my favorite types of projects!  Lots of inks, spray mists, some gems and metal, textiles and even stamping!   A project to really get inky!


Thanks for stopping!
-judy


Monday, April 30, 2012

Spellbinders™ Spring Blog Hop and Giveaway Day 2

Greetings blog friends!  Happy May Day!
This contest is now closed. Please visit the Spellbinders Blog to see the remaining open contests! Thank you!
Welcome to DAY 2 of Spellbinders Spring Blog Hop and Giveaway!

Since today is May Day, I have some little May baskets to share with you!


I created the patterned paper for each basket using a Letter Press technique with Spellbinders™ Grand Impressabilities. The baskets were cut with the Square Petal Top Box die template only I curled the petals open. I added a handle and a cute tag. Believe it or not, these are quite easy!

Supply List:

       Clearsnap Colorbox Inks – pink, mint, heliotrope
       JustRite You Inspire Me
       Scor-Pal Scor-Tape – ½”
       Buttons Galore & More – white, pink buttons
       Xyron Permanent Adhesive
       Ribbon – mint, pink, purple
       Pearl cotton – white
       Purple Buttons
       Glue Dots
       White cardstock and text paper
       Black ink
       Yellow tissue Paper
       Magnet sheets
       Viola plants or candy

First of all, I’ll show you how to make the letter press paper that I used for each of the baskets. I chose to do 3 colors and mix and match the handles, tags and base of my baskets. Each basket, including base box, handle and tag require just one 8 ½ x 11” piece of cardstock and a sheet of text or printer paper which is optional.


We’ll start with Grand Impressabilities Flower Delight, 2 magnet sheets, Colorbox Petal Point Enchantment ink and re-inkers for the pink, heliotrope, and mint plus white cardstock and text weight paper (printer paper).


I cover my work surface with plain newsprint. On that I place the 2 magnet sheets one on top of the other face up. These will hold the Grand Impressabilities in place while I ink it. I discovered 2 magnets are much stronger than one and really hold my paper and Grand Impressabilities together tightly! Next, I place a piece of cardstock (or text weight paper ) on top of the magnet. The Flower Delight Grand Impressabilities lies on top of the paper.


The magnet holds the Grand Impressabilities tightly in place so the paper under it will have a stenciled pattern of the Flower Delight. I dab the ink over the Grand Impressabilities using one of the Colorbox Petal Point inks. I use a twisting motion as well to work the ink into the small spaces of the flower centers. The goal is to ink the Grand Impressabilities! The stenciled sheet is a bonus!


In this photo, you can see the inked Flower Delight Impressabilities as well as the stenciled paper that was under it. A bonus sheet for another project! After it’s all inked, I place it on the Grand Calibur base plate with a sheet of newsprint over my base plate (under the Impressabilities) to catch any excess ink and keep my base plate clean. Next step is to carefully lay a piece of white cardstock over the Impressabilities. Once it’s in place, I hold it in place with one hand while I lay the embossing mat over it. Place the pink embossing plate on top. Hold the sandwich snuggly together and run it through the Grand Calibur™ machine.


The letter pressed sheet! The inked pattern is crisp and embossed! The actual inking of the Grand Impressabilities takes a little time, but the whole letter press process is really quite easy! Because I used a pigment ink, the Grand Impressabilities still has enough ink for a second generation print. The second time I use text weight paper which is on the inside of my baskets. Repeat the sandwich layers - base plate, newsprint, Grand Impressabilities, text weight paper, embossing mat and pink plate. Run it through the Grand Calibur machine.


The result will be a very pastel letter press sheet. I used my Xyron with Permanent adhesive to fasten the text weight paper to the back of the letter press cardstock sheet. I was able to easily cut both layers with the Petal Top Box die template and the Grand Calibur machine for my baskets.

Now we’re ready to make a basket!


These are the die templates for the basket and tag: Square Petal Top Box & Dahlia

 First, cut the Petal Top Box on the dark side of the letter press paper with text paper backing.

(I forgot to take a photo of this step earlier so this photo shows a stencil pattern paper rather than the letter press paper.)
By laying the Petal Top Box die template very close to one end, there will be enough paper leftover for the handles and tag. Cut but do not emboss the Petal Top Box!


I chose not to emboss the box template with the Grand Calibur machine because I didn’t want the emboss line across the petals. Instead, I scored the lines for folding with my Scor-Pal and stylus. No score lines across the petals!


Make all the folds. Before assembly, curl the petal edges by rolling the paper over a round pencil. Use 1/2” Scor-Tape to fasten the box together.


Cut 2 – 1 x 7 ½” strips from the leftover paper to make the handle. I used ½” Scor-Tape™ to fasten the ends together with about a 2” lap to form a 1 x 13” strip. I added 2 strips of Scor-Tape at each end of the handle to fasten it inside the basket.


For the tag, cut Dahlia #2 out of the letter press leftovers. Stamp the verse on a scrap of white cardstock with black ink. Then align the Dahlia #1 die template around the verse, tape in place, and cut. Fasten them together and punch a 1/8” hole at the top. Use Pearl Cotton to tie tag to the basket handle.


Tie a ribbon bow around the basket handle near the tag.

Thread pearl cotton in 4 buttons. Fasten one to each side of basket edges.


Voila! A basket!!

The finishing touch is tissue cut with a scalloped edge. I used Spellbinders Grand Scalloped Squares #6 to cut 6 pieces at the same time! I used 2 sheets in each basket.


These baskets can easily be filled with candies, a tiny gift or a tiny plant. I chose tiny Violas to fill each of my baskets. I tucked 2 plants into a Styrofoam cup that I had trimmed short. The tissue paper hides the cups. The little flowers are so cute peaking around the tags and handles!!!


The Spellbinders™ Spring Blog Hop will begin April 30th, and will end on May 5th, 2012. It consists of 16 individual and one grand prize drawings.  Enter the Spellbinders™ Spring Blog Hop by visiting the participating blogs each day.
From each Blog Hop post, click on the Blog Hop "Enter HERE" at the end of each blog to open the entry form. You may only enter once from each blog each day.
Spellbinders™ will randomly draw one winner from each participating blog to receive all of that day’s products. The Grand Prize Winner will be randomly drawn from the pool of entrants that sent entry forms from each and every participating blog during the 48 hours each blog was open. For the full list of official rules please click RULES.
**Enter the Contest by Clicking Here**


I hope you enjoyed your visit today!  Why not give this Letter Press technique a try!!!  This technique can be used on all the Impressabilities.   Feel free to contact me with any questions.
For even more inspiration, hop over to Iwona’s blog .  I know she’ll have something wonderful to share!
Here’s a list of all the participating designers and their blog links:

Monday, April 30th
Tuesday, May 1st
Judy Hayes You are here!
Wednesday, May 2nd
Thursday, May 3rd
Friday, May 4th
Saturday, May 5th
 
No entries will be accepted at this email address.