Showing posts with label E-Z Runner. Show all posts

Saturday, June 13, 2026

Pieced Like a Quilt Card

 Today, I'm sharing a card that was inspired by cards my mom made when she had a quilt store and did lots of quilting.  The panel in her cards was made with small strips of fabric sewn together like a quilt.  I made this card with strips of paper put together in same pattern as her quilted cards. 


I've posted all the details on Scrapbook Adhesives by 3L Blog today.  You can find it HERE.


Here' s a peek at what the pieced panel looks like after fitting all the strips of paper together.


Thanks so much for visiting!

Judy

Materials Needed:
Scrapbook Adhesives by 3L®

E-Z Runner® Ultra Strong Refillable Dispenser

Adhesive Sheets 6 x 12in.

Other: Papers, Stickers + Ephemera: Advantas Corp (Tim Holtz Idea-ology Palette Collection Indigo); Stamp: Spellbinders Paper Arts (Lasting Impressions Sentiments); Ink: Tsukineko (Versafine Onyx Black); Craft Dies: Spellbinders (Nestabilities Rectangles); Birch + Navy Cardstock


Wednesday, April 29, 2026

3D Flowers Friendship Canvas

Today, I'm sharing this bright cheery Friendship Canvas that features 3D Foam flowers from 3D Foam Garden Shapes.  It's fun project perfect for a little gift.


 The flowers. pot, tiny leaves and butterflies are all covered various colors of with Distress Embossing Glaze and heat embossed. The flowers and butterflies are popped up with 3D Foam Squares. 

All the details with directions are photos are on Scrapbook Adhesives by 3L Blog today.


Thanks for visiting!

Judy

Materials Needed:
Scrapbook Adhesives by 3L®

E-Z Runner® Ultra Strong Refillable Dispenser

3D Foam Squares White Mix

3D Foam Garden Shapes

HomeHobby™ by 3L

Premium Double-Sided Tape 1/2in

Other: Papers, Stickers + Ephemera: Doodlebug Designs Inc (Summer Fun); Stamp: Penny Black Inc(Friendship); Ink: Tsukineko (Versafine Onyx Black); Embossing Glaze: Ranger Ink (Distress Embossing Glaze- Broken China, Abandoned Coral, Picked Raspberry, Spiced Marmalade, Wild Honey, Wilted Violet, Rusty Hinge, Crushed Olive); Medium Brown Cardstock; Stretched Canvas (4 x 4 inches); Brown Watercolor or Marker (for shading on brown cardstock)


Thursday, January 29, 2026

Patchwork Birthday Card

 Hello!


Today, I'm sharing this cute Patchwork Birthday card!  


The background patchwork is pieced with squares of patterned paper.  It's easier than it sounds when done with strips fastened to a paper backing and then cut crosswise to make strips of 1/2 inch squares.  

I've posted all the details, supplies and directions on Scrapbook Adhesives by 3L Blog today.  Click HERE to go there.

Thanks for visiting!

Judy


Materials Needed:
Scrapbook Adhesives by 3L®

E-Z Runner® Petite Permanent Dots Refillable Dispenser

Thin 3D Foam Squares White Mix

Adhesive Sheets 6 x 12in.

Other: Papers, Stickers + Ephemera: Doodlebug Designs Inc. (Summer Fun - Patterned Cardstock, Solid Cardstock, Stickers, Bits & Pieces); White Cardstock

Monday, December 29, 2025

Sending Warm Wishes Card

 Happy Winter!  


Here's a sweet snowmen "Sending Warm Wishes" card to brighten someone's winter day!  


These snowmen  are fun to color with Distress Watercolor Pencils.  It's so easy to simply touch a wet paint brush to tip of watercolor pencil and paint the snowmen.  The colors are so vibrant.  

I've posted all the details with directions and step out photos HERE - Scrapbook Adhesives by 3L Blog.

Thanks for visiting!

Judy


Materials Needed:
Scrapbook Adhesives by 3L®

E-Z Runner® Ultra Strong Refillable Dispenser

Crafty Foam Tape White 108ft

HomeHobby™ by 3L

Dual Tip Glue Pen

Other: Stamp: Trinity Stamps (Freezin' Family); Ink: Tsukineko (Versafine Onyx Black); Embossing Folder: Honey Bee Stamps (Snowflakes); Watercolor Pencils: Ranger Ink (Distress Watercolor Pencils Set 4); Glitter: Ranger Ink (Distress Rock Candy Glitter); White Cardstock


Sunday, April 13, 2025

Patchwork Note Card

 Here's a quick and easy card to make!


The patchwork background is made with 1 inch squares of patterned paper fastened to cream cardstock.  Each of the squares has adhesive applied with Adhesive Sheets which makes it so easy to fasten them.  Add a contrast mat of green and a sentiment and it's done.  

I've shared all the details with step out photos and directions on Scrapbook Adhesive by 3L Blog.  Click HERE to learn more.

Thanks for visiting!

Judy


Materials Needed:
Scrapbook Adhesives by 3L®

E-Z Runner® Petite Permanent Dots Refillable Dispenser

Thin 3D Foam Squares White Mix

Adhesive Sheets 4 x 6in.

Other: Papers: Graphic 45 (Spring is in the Air); Stamp: Ranger (Simon Hurley Beautiful Blooms); Ink: Imagine Crafts/Tsukineko (Versafine Clair Twilight); Cream Cardstock

Thursday, February 27, 2025

Hello Friend Card

 Hello!


Today I'm sharing a Hello Friend card that's posted on Scrapbook Adhesives Blog.  All the details with directions and step out photos are HERE.

I used a stamp set from Simon Hurley for the pretty flowers and colored them with watercolors.  Each one was fussy cut out.  There is a die set for that stamp but I don't have it.  I find fussy cutting rather meditative!  Each one is popped up with 3D Foam Squares.  I used a Sizzix die designed by Tim Holtz to cut the tiny envelope and card insert. The background lattice was cut with another die by Sizzix called Layered Plaid.  Check all the info HERE


Thanks for visiting!

Judy

Materials Needed:
Scrapbook Adhesives by 3L®

E-Z Runner® Micro Refillable Dispenser, E-Z Runner® Petite Permanent Dots Refillable Dispenser,

3D Foam Squares Black Regular

Adhesive Sheets 4 x 6in.

Other: Stamp: Ranger (Simon Hurley Beautiful Blooms); Ink: Tsukineko (Versamark, Versafine Onyx Black), Ranger (Distress Antique Linen); Embossing Powder: Ranger (White Embossing Powder); Craft Dies: Sizzix (Tim Holtz Layered Plaid, Tim Holtz Postale); Cream, Cream Textured, Black + White Cardstock; Cream Text Weight Paper; Watercolors (or Water Base Markers); White Gel Pen

Friday, September 13, 2024

Number 70 Birthday Card

Hello Friends!

I was recently invited to a party to celebrate a 70th birthday and needed to wrap a gift. So I stamped some Kraft packing paper.  It turned out so well that I decided to use the leftover paper to make a card. 


I'm super happy with how it turned out!  

All the directions with step out photos are on Scrapbook Adhesives by 3L Blog today.  Click HERE to read it.


This design could be used for any age number.  I used recycled Kraft packing paper on this card.  A different paper would change the whole look!  I may be using this idea for a few more cards!


Here's the how the gift wrap turned out!

Thanks for visiting!

Judy

Supplies:

Scrapbook Adhesives by 3L®


Other: Inks: Ranger Ink (Distress Oxides Tumbled Glass, Broken China, Chipped Sapphire, Uncharted Mariner); Embossing Powder: Ranger Ink (Clear); Stamps: Stampers Anonymous Tim Holtz (Numeric, Merchant, Simple Sayings, Inquisitive, Crazy Talk), Small Alphabet Set; Paper: Recycled Kraft Packing Paper; Kraft, Navy and White Cardstock

Monday, July 29, 2024

Metallic Foil Stripes Card

 Hi Friends! 

It's been a while since I posted.  I took a much needed break from crafty obligations. I needed some time for me and time to be outdoors in the summer.  I have several flower beds to tend to and I love being out in the fresh air and sunlight.  

Today, I'm back with a card made for Scrapbook Adhesives by 3L.  

It's very easy to make with Metallic Transfer Foil Sheets Pastel Colors and Crafty Foam Tape Black 108ft..  You can find all the directions with step out photos on Scrapbook Adhesives Blog today.  I used E-Z Runner® Ultra Strong Refillable Dispenser to put the layers together.  The stamp and coordinating die are from Taylored Expressions All Occasions.  The only other supplies are textured white cardstock and black cardstock.  Fun and easy to make!

Thanks for visiting!


Monday, January 15, 2024

Cute Kitty Card

 Hi everyone!

Today, I'm sharing a Cute Kitty card I made for Scrapbook Adhesives by 3L.


This is a very easy to make card using Doodlebug Design "Pretty Kitty" Collection of papers and sticker along with adhesives from Scrapbook Adhesives by 3L.  I've posted all the instructions with photos at Scrapbook Adhesives by 3L Blog.

Thanks for visiting!

Judy


Materials Needed:
Scrapbook Adhesives by 3L®

E-Z Runner® Petite Permanent Dots Refillable Dispenser

E-Z Dots® Repositionable Refillable Dispenser

Crafty Foam Tape White 108ft.

Other: Papers, Stickers + Ephemera: Doodlebug Design Inc.(Pretty Kitty Collection); White Cardstock; Bakers Twine

Wednesday, December 13, 2023

Christmas Cookie Bag Topper

 Hello friends!

Do you make cookies to give as gifts during the holidays?  I like to give some to a few family friends. This year I decided to make a Cookie Bag Topper to make them festive.


I've posted all the details with instructions and photos showing how I made this on Scrapbook Adhesives by 3L blog today.  You can click HERE to the the post

It's an easy project that can be done in steps to fit into a busy schedule.


Once the "cookies" are die cut and assembled, putting the topper together goes quickly.  

Of course, baking the cookies to put in the bag take more time!  But oh so good!

Thanks for visiting!

Judy


Materials Needed:
Scrapbook Adhesives by 3L®


Thin 3D Foam Squares White Mix

Home Hobby by 3L®

Premium Double-Sided Tape 1/2in.

Other: Papers, Stickers + Ephemera: Photo Play Paper Co (For the Joy of Winter -Through the Woods); Stamp: Stampers Anonymous (Tim Holtz Christmas Cartoons) ; Ink: Imagine Crafts/Tsukineko (Versamark), Ranger Ink (Distress Vintage Photo); Embossing Powder: Ranger White Embossing Powder; Craft Dies: Sizzix (Tim Holtz Fresh Baked #1, Gift Tags); Kraft, Red, Aqua + White Cardstock; Red and White Bakers Twine; Clear Treat Bag

Monday, May 29, 2023

Collage Tag with Metallic Transfer Foil

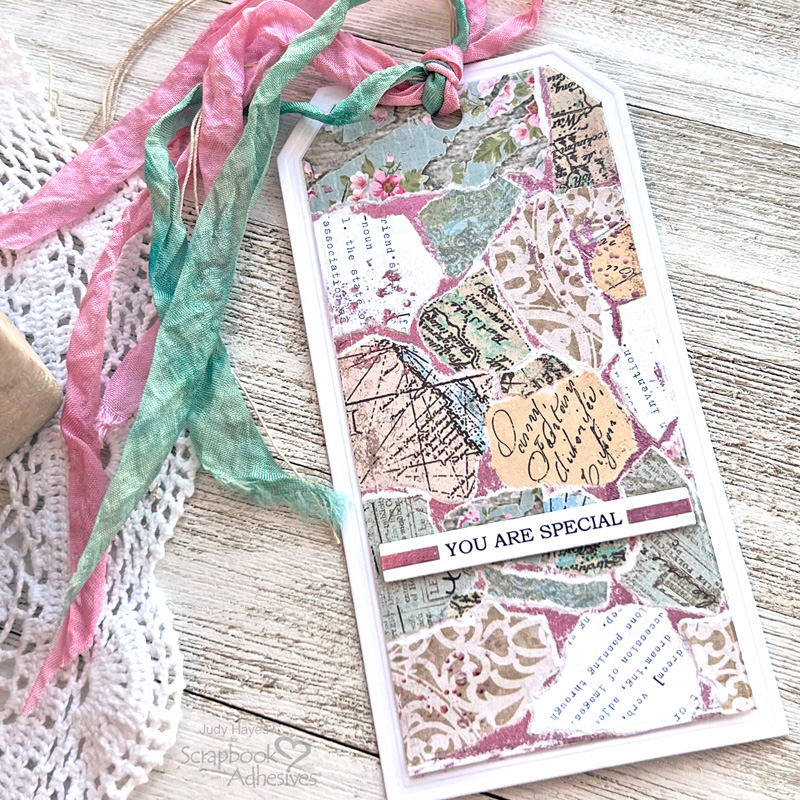
 Today, I'm sharing a tag that I put together with a collage sheet made with paper scraps, Adhesive Sheets 6 x 12 in. and Metallic Transfer Foil Sheets Pastel Colors. The collage technique is easy and can be adapted to other projects. I previously posted a home decor piece called Joy Collage Frame Canvas made with same collage sheet. You can see it HERE


The collage technique is easy and can be made with any assortment of papers. There are multiple colors of foil that can be used.  So many ways to use it on a card, tag, scrapbook page or even home decor frame. 

More details and directions to make it are on Scrapbook Adhesives Blog today.

I hope you've found some inspiration here!

Thanks for visiting!

Judy


Materials Needed:
Scrapbook Adhesives by 3L®

Adhesives Sheets 6 x 12in.

Metallic Transfer Foil Sheets Pastel Colors

Thin 3D Foam Squares White Mix

E-Z Runner® Ultra Strong Refillable Dispenser

HomeHobby by 3L®

Premium Double-Sided Tape 1/8in

Other: Papers, Stickers + Ephemera: Assorted Patterned Papers; Ink: Ranger (Distress Inks to coordiate with collage); White Heavy Cardstock; Dies: Sizzix Tim Holtz Framed Tags; White Seam Binding; Gold Floss; Computer Printed Greeting on White Cardstock


Thursday, December 29, 2022

Snowmen Winter Note Cards

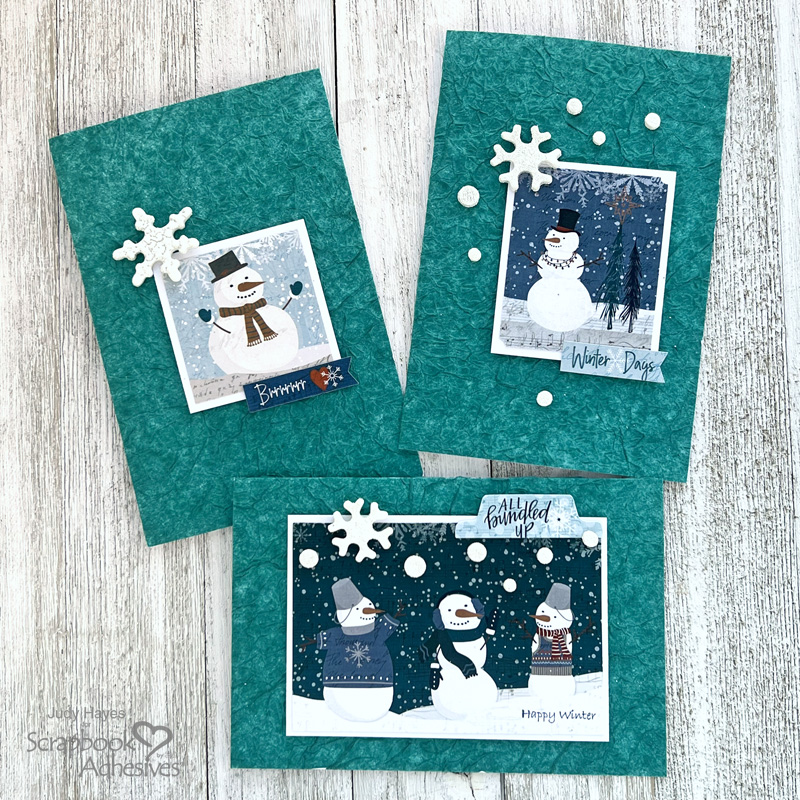
 Hello! As I write this, it's been crazy cold and snowy in Minnesota!  Way too COLD!  With that on my mind, I was inspired to make some Snowmen Winter Note Cards.  They're easy and quick!  Perfect for a note to brighten someone's day! 


I used a super easy technique to make the backgrounds on these cards with crumpled tissue paper. Do you save tissue paper? I do!  I liked the color of this teal tissue paper so I saved it. It's been laying around in my craft room waiting to be used.  It made a wonderful textured background!  

I used  Adhesive Sheets 4x6 inch applied to front of each card.  Next, after peeling the liner from adhesive, I pressed the card on crumpled tissue paper.  After turning it over, I pressed it firmly in place and trimmed excess tissue from edges.  

All the details are on Scrapbook Adhesives by 3L Blog.  Just click HERE to go there.

Snowflakes are 3D Foam Snowflakes from Scrapbook Adhesives by 3L. 


Happy Winter! 

Judy

Supplies

3D Foam Snowflakes

Photo Play Paper (For the Love of Winter Collection Pack and Cardstock Ephemera pack)
Teal Tissue Paper
White Cardstock

Thursday, July 21, 2022

Mixed Media Background Card

Hello everyone! 


Here is a mixed media background card that can easily be used for many occasions.  Simply keep some greetings on hand to add as needed.  


The background is fun to make with E-Z Dots® Repositionable Refillable Dispenser and Distress Oxide sprays and Distress ink.  Once the paper is dry, simply rub off the repositionable adhesive.  Add more color as desired.

In the photo the adhesive has been removed and reveals the paper color underneath.  I added Uncharted Mariner ink over and misted with water for the final background.  

Find all the details with step out photos on Scrapbook Adhesives by 3L Blog HERE

Thanks for visiting!

Judy


Supplies:

  • Hero Arts (Sending Love Mail Stamp Set); Imagine Crafts/Tsukineko (Versafine Onyx Black Ink Pad); Ranger (Clear Embossing Powder, Distress Oxide Sprays (Villainous Potion, Saltwater Taffy, Distress Ink Pad (Uncharted Mariner); Cardstock (White, Black)

Sunday, March 10, 2019

Amazing Paper Grace March Die of the Month Blog Hop


Sponsored - As a designer for Amazing Paper Grace, I  receive dies to create projects.   I'm also a designer for Scrapbook Adhesives by 3L and receive product to use for projects.

Do you ever suffer from blank page syndrome?  Or do you clear your schedule and your table and sit down to make a card, and bam - your mind goes blank.  That's why we're here!  We love bringing you inspiration for the Die of the Month and today is our Die of the Month Blog Hop for March.  

Since we all see things differently, it's our aim to show you how each of us approached designing with this die and the lovely pieces that are a part of it.  Our hope is that you snag a picture or two for your inspiration file and they come in handy next time you sit down to create.  Our list of links at the bottom of the post lead to all the inspiration.

The six pieces that make up Spun Blessings Oval combine to make a card front die, perfect for a background or you can creatively use all of the inlays for either accents or borders.  You may have noticed, it's a big die but the better to make alternative designs like the little baskets that help to create an ensemble.

If you want to find out more about the Club - prices, how you sign up and what's included, please look --------> HERE.
If you missed the introduction and want to know more about what inspired the Die of the Month Club, look ------->HERE.

Here's my card today....


 I've used all the dies as shown above to cut the black cardstock except I didn't use the center black piece on the card.  Instead, I cut that piece from natural color patterned paper.  It really doesn't show much on the card but makes a good background for the verse pieces that are popped up over it. I used the largest die to cut background paper to fit behind the black.  I love how easy it is to cut 2 layers - one die-cut with intricate design and other mostly solid to fit behind. Pieces of seam binding are fastened behind the vertical openings with pearls.  The oval with verse was cut with Spellbinders Hemstitch Ovals designed by Becca.  It pairs so nicely with Spun Blessings Oval! I cut the verse with oval and hemstitch dies and backed it with oval cut from black cardstock.  Pearls, a loopy bow of seam binding and a pearl stick pin finish the card.  The card is 5 x 7 inches overall with card base about 5 x 6 inches with top fold.  All patterned papers are from Graphic 45 Love Notes.

And my second project is a decorated box...


This is a paper mache box that I painted gold and dry brushed white gesso over the edges. The band is fastened to the box top only and tucks under the lid edges.  To make the band, I used only the rectangular inset die pieces to cut a strip of black cardstock.  To do that, I simply laid the dies end to end on a strip of cardstock, die cut and repeated to the length I needed.  If you look closely you can see a solid strip between the design near the small oval.  A strip of patterned paper is behind the die cut band.  The large oval is 2 pieces cut with end of largest die and curved design pieces with a solid piece cut from patterned paper behind.  I fastened them both to the box top first and fastened the band over it. The banner "tails" that extend from center oval were cut with Spellbinders Oh Happy Day and Vintage Pierced Banners. On the natural pieces (cut with Oh Happy Day), while paper was still in die, I traced around the inside of it with black marker pen. The small oval was cut with Hemstitch Ovals, top from patterned paper and under oval of black.  I added 2 buttons layered together and surrounded by pearls.  Pearls accent the banner tails as well.  I love how Spun Blessings Oval die inset design pieces can be used separately to create other designs!  Be sure to check out the other designers projects!  You'll see other ways to use this die set that are so creative and fun! 


Supply List: 
Dies: Spellbinders Hemstitch Ovals by Becca Feeken; Vintage Pierced Banners; 
Paper:   Graphic 45™ Love Notes Collection; Cardstock: Black, Natural
Paint: (Box)  DecoArt® Americana® Multi-Surface Satin Muted Gold; Liquitex® White Gesso
Accessories: Pearl Stick Pin; Seam Binding; Pearls; Paper Mache Box; Buttons; Sharpie® Pen
Adhesives: 

More inspiration is just a click away.  Stop by with each Creative Team Member to see more!
We can’t wait to see what you make with these exclusive dies – be sure to post your creation on the Amazing Paper Grace Die of the Month page -------> HERE or on Instagram using the hashtag #AmazingPaperGraceClubKit