Showing posts with label Glue Dots. Show all posts

Tuesday, January 8, 2013

A Scrapbook Page for Dad

Hey everyone!!!
 
Shock of shocks, I'm posting something!  I know I've been pretty remiss........ sorry.  I've been way busy and this got pushed to the end of my priority list.  I'm hoping to do better for 2013!
 
Tonight, I've been packing for CHA!  I'm excited to be heading to Anaheim tomorrow.  I'll be working in the Spellbinders booth.  Lots of work and also exciting.  This year Spellbinders is sponsoring a class for CHA.  I'll be helping with that on Friday as well as a couple other classes.  I really like helping with the classes.  I love helping others learn.  The most exciting part.....I put together the project that will be used for the class!!!!  so awesome!  I must give credit to two very talented DT members who helped with the project: Tina and Christine.  We each created a project.  Then I took bits and pieces from each project and pulled it all together.  I'll share once the class is over!  (if I can that is, I best check on that!)
 
So I pulled out a Spellbinders project to share with you today.   This is scrapbook page I created for my Dad.  All the patterned paper strips were embossed in various folders. Then I rubbed ink over the embossed pattern to highlight the raised areas.  All the strips were tan cardstock.  This is an easy technique, especially with any dye ink pad that has a hard surface.  I don't mind a little distressed look so if a bit of the ink strays beyond the embossing, it's okay!
Between each of the wide strips are narrow dark red strips that I also inked.  The effect is much more subtle with a matching color ink.
 
I had to add a touch of blue on the page to bring out the blue of Dad's eyes. I've inked the edges a bit.  I added journaling strips on blue across the bottom of the page.  I found some old buttons to add to the strips pulling out one blue and one red button.  A tag with "Love you, Dad" is the simple title. 

You can find this scrapbook page in the Spellbinders Idea Gallery here!

thanks to all you loyal friends for not giving up on me!!!! 

Happy crafting!
-judy
 
 
Supplies:
Spellbinders: 
•S4-322 Grommet Tags
•S5-029 Nested Lacey Pennants
•LF-126 Grand Squares
•ES-003 Valor
 •ES-004 Whimsy
•ES-006 So Trendy
 •EL-002 Regal
 •EL-003 Patchwork
•EL-004 Imperial
 •EL-006 Mystic
•Spellbinders Grand Calibur® Die Cutting and Embossing Machine
 •My Mind's Eye, Lost and Found Christmas Merry Patterned Paper
•Bazzill Basics Paper, Prismatics Tawny Medium Cardstock, Rain, Wine Cardstock
 •Clearsnap, ColorBox Mudslide Archival Dye Ink
 •Cosmo Cricket, Tiny Type Red Letter Stickers
 •Buttons Galore And More, Natural Buttons
 •Scor-Pal, ½" Scor-Tape
 •Glue Dots, Glue Dots
•SCRAPBOOK ADHESIVES BY 3L, 3D Foam Squares, E-Z Runner
Other Supplies: Off White Cardstock; Raisin Alcohol Ink; Brown Dye Ink; Chipboard Letters; Black Marker; Brown Buttons; Tan Pearl Cotton Thread/Cord

Monday, September 10, 2012

Two Hearts Wedding Card

Something in blue........
 
 
a wedding card with paper flowers and pearls.
 
This is a card I created for Spellbinders.  The little paper flowers were created with Donna Salazar's set called Bitty Blossoms.  Aren't they cute?  These are the perfect size for cards, especially cards that will be hand given.  The flowers are too dimensional to be mailed in a regular envelope.  A padded envelope works well though!  A card like this is well worth the extra postage!!!


You can find a list of all the supplies in the Spellbinders Idea Gallery.  Just click here.

So happy to have you visit my blog!
smiles......
-judy

Sunday, April 8, 2012

Happy Easter!

Wishing you all a glorious Easter Day!
This scrapbook page seemed perfect to share today!

These are some of my favorite photos of my granddaughter, Alyssa!  She was so cute in her Easter dress hunting for Easter eggs on the church lawn.  I really like how the wind twirled her skirt in the center photo. 

I chose 3 - 4 x 6" photos for this page. I've cut the edges of each one with the largest die template from Spellbinders™ S5-090 Romantic Rectangles.  It's the perfect size!  And adds such a nice touch!  Into each corner, I looped some sheer ribbon and fastened the ends behind the photo.  I added a pearl between the loops which makes it resemble a bow.

The border at the bottom of the page is made up of 5 of Spellbinders new Cut-Fold-Tuck shapes.  This one is from S5-011 Angle Approach.  It's the medium size shape in the set. I cut five of them from a soft mint colored paper from Echo Park that has a pink pattern on the back side. When the folds are made, the pink back side of the paper is visible.  I layered each Cut-Fold-Tuck square over a square of pink paper to show through the openings.  Each one is layered over a white square.  I added a tiny pearl from Want2Scrap to the center of each one.

At the very bottom and top of the page, there's a border of diamonds.  I used Spellbinders ES-001 Simplicity M-Bossabilities to emboss that pattern.  I cut the narrow strip of paper first.  Then I aligned it with one row of diamonds in the Simplicity M-Bossabilities folder and embossed it.  I repeated this process moving the strip in the folder until I had the whole thing embossed.  I sanded it lightly to bring out a little of the white core of the paper on the embossed edges.

The title letters were cut with the Spellbinders PP-001 Presto Punch using PT-F01 Plain Jane Capital and PT-F02 Plain Jane (Lower Case) alphabets.  I cut them from white Fun Foam and pink paper.  I glued the paper to the foam letters making my own dimensional letters!

I added a line of journaling under the title.  It's hand printed on a strip of vellum which recedes into the background of the page.

 
Have a wonderful Easter Day celebrating our risen Saviour!
-judy

Thursday, April 5, 2012

"So Pretty" Scrapbook Page

Hello everyone!   I have a scrapbook page to share today!  This is a page I created for Spellbinders back in January.  It's now in the gallery on their website so I can share it with you! 

I love this photo of my granddaughter!  She seems to be saying "Okay, Mom, I'll pose for a photo but hurry up so I can get back to playing!"  She's peaking out of an old tire at a playground.  She can play rough and tumble and keep up with her brothers or dress up pretty and play dolls.  No matter what, she's so pretty! 

I used 2 sizes of the Grand Dahlia for mats along side my photo.  I sanded the edges which revealed the white core of the paper and really defines the edges.  I also sanded edges of the hearts, title letters and buttons.  Yes, the buttons are die cut of paper, too!  Sanding the edges is one of my favorite techniques after embossing on any paper with a white core!   I used 2 sizes of Romantic Rectangles as mats on the other side of the photo for a touch of "lace"!  The journaling is hand printed on narrow strips of paper and then cut apart.  All the supplies are listed below.

Thanks for stopping!  I promise to have more posts this week!!!!  So stop back soon!
-judy

Supplies:
KaiserCraft Lullaby paper
Glue Dots - Mini Glue Dots
White Cardstock
White Pearl Cotton
Black Calligraphy marker

Thursday, February 23, 2012

Birthday Flowers

I found some time Monday (a day off from work!!!) to make a card for fun!!! 
Here's a birthday card featuring the new Bitty Blossoms, Spellbinders S5-086 by Donna Salazar.  The flower size is perfect for cards!


There are 3 sizes of flowers along with 3 leaf die templates in the  set.  I've used the 2 smaller flowers for this card.  The pink and yellow one are the same.  I added glitter to them after they were shaped.   For the greeting, I used a long pennant from S5-029 Nested Lacey Pennants.  The verse is from Waltzingmouse Fancy Phrases.  All papers are from the Carmen Collection by Anna Griffin.  I colored the pearl head pin with Copic marker E97.


Happy Creating!
-judy

Supplies:

Anna Griffin Carmen Collection paper
Waltzingmouse Fancy Phrases
Sparkle and Sprinkle Glitter - Sunny Daze, Starfire
Sparkle and Sprinkle Brushable Glue
Creative Impressions Yellow ribbon
Versafine Onyx Black ink
Glue Dots
Pearl head pin
Copic marker E97
Ivory Cardstock
Green Chalk

Sunday, January 15, 2012

Spellbinders Abilities and Beyond Blog Frenzy Day 5

Welcome to the 5th day of the Spellbinders Abilities and Beyond Blog Frenzy!
Spellbinders™ Paper Arts is absolutely thrilled to bring you our largest product releases ever! These new collections are some of the most innovative and beautiful die cutting and embossing templates in the world! The Spellbinders Abilities and Beyond Blog Frenzy allows you a sneak peek of our introductions for the 2012 Winter Craft and Hobby Association trade show later this month.

Win today’s new Spellbinders products!

Be eligible to win the Grand Prize by entering each day, see the schedule below!
Enter my Blog Frenzy from 12:00 am Eastern Standard Time (EST) January 16, 2012 until 11:59 pm January 17, 2012.
Today’s participating Blog Frenzy includes my blog and Holly Simoni and Heidi Blankenship’s blogs.
You can enter yesterday’s blogs, Samantha Walker, Christine Emberson and Lesley Langdon through January 16 at 11:59 pm EST.
See the Spellbinders Blog for the complete schedule of designers and contest rules.

Thank you Spellbinders Paper Arts for sponsoring this contest!


Here are the new dies I’m introducing:


S5-111 Angle Approach MSRP: $ 29.99
PRODUCT SIZES:
1: 1 3/8”
2: 2 ¼”
3: 4”


E8-014 Classic Decorative Inserts Six
MSRP: $ 19.99
PRODUCT SIZES:
Butterflies: 7/8 x 8”
Flowers: 1 1/16 x 8”
Dots: 5/8 x 8”


I am honored to be introducing the new Cut • Fold • Tuck dies from Spellbinders! These European inspired designs create beautifully layered geometric designs in one pass through your die cutting machine! Simply fold the pieces, tuck them under and watch as the amazing designs develop! With multiple dies in each set, you can easily and quickly create different sized Cut Fold Tuck die cuts, or layer them for wonderful dimensional effects!

Watch this introductory video!


See this how-to video on the new Cut Fold Tuck dies:

 
Hello blog friends!!!

I’m so excited to be sharing these new Spellbinders shapes with you today!!!

S5-111 Angle Approach and E8-014 Classic Decorative Inserts Six

The new Spellbinders Shapeabilities Cut-Fold-Tuck die templates are so unique!  You’ll want to add them to your “Wish List” for sure!!!  I've had a lot of fun with S5-111 Angle Approach!

Look at the detail in E8-014 Classic Decorative Inserts Six! These are designed to coordinate with Spellbinders Edgeabilities® die templates that you may already have –E8-001 Classic Scallop, E8-003 Classic Triple Scallop or E8-004 Classic Ric Rac as well as the new E8-008 Classic Edges Two (see the reveal on Day 3 by Kazan Clark).

I’m also using the new Spellbinders S4-354 Splendid Circles (revealed by Latisha Yoast on Day 1) and EL-002 Regal  M-Bossabilities™ folder(See Day 2 reveal by Julie Overby) .

Let’s get to my project!

I designed a Mother’s Day card and coordinating box with S5-111 Angle Approach #2, 3 (#1 being the smallest). I used E8-014 Decorative Inserts Six – Dots along with E8-008 Classic Edges Two – Triple Scallop.  I’m also using the new Spellbinders S4-354 Splendid Circles (revealed by Latisha Yoast on Day 1) and EL-002 Regal M-Bossabilities™ Folder (See Day 2 reveal by Julie Overby) .

I’ll start with the card directions!


Here’s all the Spellbinders die templates :


First, we’ll create the layers on the card front, and then I’ll show you how to make the Angle Approach medallion. Supply list is at the end.

Starting at the card bottom, I added a narrow strip of green, then a strip of dark pink. I stamped the verse with olive green ink on light pink cardstock and fastened it over the dark pink and green borders. All the paper sizes are listed below on the Supply List. 

Now, for the FUN parts!

First, I cut the triple scallop edge on a 4 ½ x 5 ½”piece of green cardstock. I aligned the edges of Classic Edges Two – Triple Scallop with the paper edge and centered and taped it in place.


Next, I cut the Dots. Again I used tape to keep the Classic Decorative Insert Six - Dots  from moving when passing through the Spellbinders Grand Calibur® machine.


Because many of the new Decorative Inserts are very detailed, it’s best to place it parallel to the long sides of the Cutting Plate.

Tip: This allows for even pressure throughout the cutting pass. When fed horizontally, or parallel to the short side of your cutting plates, you may need to add a shim. First, cut the Classic Decorative Insert vertically. If an area didn’t cut completely, add a paper or cardstock shim only at that section. Cut again, then emboss for a beautiful and intricate design!

Next, I cut the Classic Edges Two - Triple Scallop on a piece of dark pink cardstock. I used my green piece as a guide to cut the edge exactly the same. I removed the green piece before running it through the Grand Calibur machine.


Embossing comes next! I love the look of embossed paper! I’m really enjoying the new Spellbinders M-Bossabilities™ folders. Each one has two different embossing patterns!   I used EL-002 Regal M-Bossabilities on this card.


I centered the cardstock on the pattern from side to side. I’m embossing with my cardstock at a right angle to the folder because the pattern matches the scalloped edge better that way.  I’ve used 2 pieces of painter’s masking tape to mark the side to side placement. I’ve aligned the bottom edge so that I can see the embossing folder through the top holes only in the Dots pattern. I used 2 small pieces of removable tape at the top to keep it in place. Remove painter’s tape before embossing.

To use the M-Bossabilities folder in the Grand Calibur machine, I use the A-Base Plate, M-Bossabilities folder and the raspberry D-Adapter Plate. (Sometimes I use the pink B – Embossing Plate in place of the A- Base Plate if my paper is thick or I want a less defined pattern.)


Here you can see the wonderful embossed pattern! It fits so well with the decorative edge!

I threaded the silk ribbon through a darning needle to thread it through the top holes. Before taping the ends to the back, I added the dark pink scalloped edge piece. Then I glued the ribbon ends in back.  I adhered it to the card.
Here’s the completed card front without medallion!


Now, I’ll show you the medallion! It’s really easy!


These are all the pieces needed:
S5-111 Angle Approach #3 and another center cut and embossed on pink side of paper
S5-111 Angle Approach #2 cut and embossed on green side of paper
S4-126 Classic Squares SM #4 and S4-354 Splendid Circles # 3 and 4 cut and embossed from light pink cardstock

Double sided paper works so well for these “Cut-Fold-Tuck” shapes!

I like to fold all the edges that will be tucked first. Then I tuck them all.


I’ve made all the folds on both the square and star shape. I’ve also snipped out the center of the star shape and trimmed off the connecting paper. I’ll use it on top along with the second center shown on the side.


Next, I tucked all the folded pieces.

I’ve layered the star shape onto the light pink Splendid Circle. The square Angle Approach is first layered onto a light pink square and then onto the smaller Splendid Circle. I used the pink square first so all the open pattern would show pink through it. The Splendid Circle isn’t quite big enough to add color to all the corners. I’ve layered the 2 centers, one green side up and outside one with pink side up, and fastened with a Glue Dot.  I added a pink pearl to the center.


The finished medallion! The square is fastened with Scrapbook Adhesives by 3L® 3D Foam Squares. I used a Mini Glue Dot for the center.
Add it to the card front to finish it!

Card Supplies:
Spellbinders™ Products:
E8-014 Classic Decorative Inserts Six - Dots
E8-008 Classic Edges Two – Triple Scallop
EL-002 Regal M-Bossabilities™ Folder
S4-354 Splendid Circles #3, 4
S5-111 Angle Approach #2, 3
S4-128 Classic Squares SM #4
GC-001 Grand Calibur® Machine
Cardstock pieces needed:
White cardstock – 9 x 6 ½”
Bazzill Spring Breeze (green) –5/8 x 4 ½” and 4 ½ x 5 ½”
Bazzil Chablis (dk. pink) – 3/8 x 4 ½”
Bazzill Prismatics Iced Pink – 1 ½ x 4 ½”
Plus:
KaiserCraft Mini Clear Stamp set – Occasions
KaiserCraft Chanteuse Eco paper
Want2Scrap Pearls – Pink
Scrapbook Adhesives by 3L – 3D Foam Squares
Glue Dots – Mini Glue Dots
Olive Green Ink
Pink Silk Ribbon

Do you really want to know how to make the box, too???

Okay….here goes!


I’ll start with the box itself first.

I cut and embossed one LF-007 Hexagon Envelope of green cardstock and one of pink cardstock.   I added Scor-Tape to the flaps of the pink one for the box bottom.


I cut 2 – 2 ¼ x 7” strips of green cardstock. I scored each one at 2 ¼”, 4 ½” and 6 ¾”, which leaves a ¼” flap. I folded all score lines. I glued the 2 strips together with the ¼” flaps to form my box walls.


I set this onto the pink hexagon base and fastened all the sides with the Scor-Tape.  I’ve distressed the edges a little bit with Pumice Stone ink before assembling it.


The box top is held together with little circles cut with a die template from S5-072 Blossom Tags and Accents. (Tip: The little circle from S4-354 Splendid Circles could be used instead.) These are cut from the green side of the KaiserCraft Eco paper.   I’ve rubbed on a little Pumice Stone ink on all the edges of the top, too.


I placed the box top on the bottom and put a rubber band around the top edge to hold it together. I added the little circles with Memory Glue Dots. Once all the circles were in place, I took the box top off and pressed each circle firmly in place. I added a medium pink pearl to the center of each circle.

Now, we’ve come to the most involved part!!!

The dimensional Angle Approach piece for the top! It takes a little patience to make the folds. After that, it’s not too hard!


These are the pieces needed. You can see the dimensional piece is already folded and shaped. I’ll take you through those steps next.

I’m switching colors for this step! I forgot to take photos as I made the piece I used on the box so I recreated the steps in a different color paper. I didn’t have enough of the pink and green.


The dimensional shape starts with 2 - Angle Approach #3 shapes folded and glued together. I removed the center from both just as I did for the card. I also scored from each point across to the other point all around the shape. The top shape is scored in the photo.


I folded all the angle pieces up just as for the card. I did not tuck them!


I also folded the “tuck” piece down. Hard to explain that in words! The open angle is folded up and the sold part is folded down on the score line. I did this on both shapes.

I cut each one apart.   Next I matched 2 points together on top and folded it along the bottom.  There’s one done in this photo, lower right corner. The points are together on top. I repeated this all around for each one.


Both pieces are folded and ready to glue. I lapped a point on each end to glue them together. I cut off the under open angle piece so it wasn’t double thick.


Now it forms a circle again.

Now I’m back to the actual box photos!

To assemble the box top, I cut and embossed a light pink Splendid Circles #4. I centered the #2 Splendid Circles die template on it and traced the center opening with a pencil. This will be my guide when I glue the medallion on.

I used craft glue in a ring about ¼” from the drawn circle. Beacon Craft Glue works great for gluing as it sets up fast! I laid the dimensional Angle Approach circle on the glue and squished it smaller so the center aligned with the pencil line. I arranged it as even as possible, and held it in place until the glue set up.


The assembly of the square Angle Approach for on top is the same as for the card (see above). To fasten it to the box, I used a stack of Scrapbook Adhesives by 3L – 3D Foam Squares (3 or 4) in the center.


Voila! It’s done.

Box Supplies:
Spellbinders Products:
S4-354 Splendid Circles #3, 4
S5-111 Angle Approach #2, 3
LF-007 Hexagon Envelope
S5-072 Blossom Tags and Accents
S4-128 Classic Squares SM #4
GC-001 Grand Calibur® Machine
Other supplies:
Bazzill Spring Breeze
Bazzil Chablis
Bazzill Prismatics Iced Pink
KaiserCraft Chanteuse Eco paper
Scrapbook Adhesives by 3L – 3D Foam Squares
Glue Dots – Mini Glue Dots
Want2Scrap Pearls – Pink
Scor-Pal and Scor-Tape
Beacon Craft Glue
Pumice Stone ink

Here's another card that’s similar in design yet totally different in color. There are 2 - S5-111 Angle Approach shapes that make up the medallion on this card. Can you pick them out?


I’ll post directions for this card soon.

Thank you so much for getting this far on this post!!! It’s a long one!

By entering the Spellbinders Abilities and Beyond Blog Frenzy you agree to the Official Rules. For questions on the Spellbinders Abilities and Beyond Blog Frenzy, send an email to contestquestions@spellbinders.us ; no entries will be accepted at this email address.

TO ENTER:
My blog is open for entries from 12:00 am, January 16, 2012, until 11:59 pm, January 17, 2012, EST.
1) Send your Blog Frenzy email entry to: reveal15@spellbinders.us
2) The subject must be S5-111 Angle Approach and E8-014 Classic Decorative Inserts Six
3) Send!   
Be sure to visit all the Designers on their Blog Frenzy dates!

January 12
January 13
January 14
January 15
January 16
Judy Hayes – you are here!
January 17
January 18
January 19
Daily winners will receive an email within 24 hours of the blog frenzy’s closing. The winners will have 72 hours to reply to that email to claim prize. If a winner fails to respond within 72 hours, a new winner will be drawn.
To be eligible for the Grand Prize, enter each and every Blog Frenzy within its designated time period, send your entries from the email address for each entry. The Grand Prize has a retail value of over $1900 and includes the complete Spellbinders line of die cutting and embossing templates released at the 2012 Winter CHA show, and a Spellbinders Grand Calibur® Die Cutting and Embossing Machine!

I love your comments! Unfortunately your comment does not count as an entry, so be sure to enter as stated above, and then leave a comment!   
Thank you for visiting and good luck!!

To receive information and announcements from Spellbinders, sign up for the Newsletter and subscribe to the Spellbinders Blog. Find us on Facebook, Twitter, and YouTube and Pinterest. Thank You!

Spellbinders and M-Bossabilities are trademarks of Spellbinders Paper Arts, llc.
Grand Calibur is a registered trademark of Spellbinders Paper Arts, llc.

Monday, January 10, 2011

Spellbinders Paper Arts "To Die For!!" Winter Release Blog Frenzy - Day 2


This blog contest is now closed! 
See the list below for other opportunities to win!


Spellbinders Paper Arts "To Die For!!" Winter Release
Blog Frenzy
January 10 – 18, 2011

Welcome to the second day of the Spellbinders Paper Arts "To Die For!!" Winter Release Blog Frenzy!

Spellbinders™ Paper Arts’ has been working hard to bring you another selection of the most innovative and beautiful die templates in the world. The To DIE For!! Winter Release Blog Frenzy allows you a sneak peek of the products we’re introducing at the Craft and Hobby Association trade show later this month. The To DIE For!! Winter Release Blog Frenzy is from January 10 - 18, featuring 16 fabulous Designers and prizes To DIE For!!

• Win today’s new die templates!

• Be eligible to win the Grand Prize by entering each day from each blog!

• One entry per person, per blog please, on the designated days!

• Each contest is open for 48 hours to enter the contest!

• You have until 12:01 a.m. January 13, 2011 Central Standard Time to enter my contest. Be sure to read the Official Rules before entering so that your entry will be valid!

These are the Designers and their contest dates:

January 10

January 11

January 12

January 13

January 14

January 15

January 16

January 17

Daily contest winners are randomly chosen from valid entries, as stated in the Official Rules. The winners will receive an email within 24 hours of the contest’s closing. The winners will have 72 hours to reply to that email to claim the prize. If a winner fails to respond within 72 hours, a new winner will be drawn.

Entrants that send valid contest entry emails to each of the contests will be automatically considered for the Grand Prize. The Grand Prize has a retail value of over $800, and includes Spellbinders CHA Winter 2011 release die templates revealed in the Spellbinders To DIE For!! Winter Release Blog Frenzy and a Grand Calibur™ die cutting/embossing machine!

Thank you, Spellbinders Paper Arts, for sponsoring this contest!

I’m thrilled to share S4-319 Lattice Rectangles, a new Nestabilities® Decorative Elements die template, with you...


I chose to make a Valentine’s card to show off this wonderful new set: S4-319 Lattice Rectangles!
I used 3 of the 4 die templates on my card. Can you pick them out?
Are you wondering how I got a square card with a rectangle die cut?

Let’s see the steps…

These are the die templates I used.


First, cut a white card with LF-161 Grand Labels One. The Grand die templates are great for this! I used a 5 ¼” x 10 ¼” piece of Worldwin White card stock folded in half. I positioned LF-161 Grand Labels One #2 (the smallest being #1) so that part of the fold was inside the cutting edge.


You can see the die template peaking out along the fold….


and ready to be cut with LF-161 Grand Labels One #2 taped in place.

The next step is to cut and emboss the pink mat out of 3M Post-It Craft Paper. This color is called Bashful. Use the same LF-161 Grand Labels One #2.


To make the mat about 1/8” smaller all around, carefully cut along the embossed line.


It's easy to follow the embossed line is for cutting.

Then, emboss it again with 12-1009 Flourish Impressabilities™.


It’s a little too big to fit completely on the Flourish Impressabilities so do half at a time. 


After embossing the first half, sand it lightly to reveal the white core of the Post-It™ Craft Paper.  The color coating is quite thin making it easy to sand.  It’s also easy to sand off more than planned so sand gently, especially along the edges.

After sanding, emboss the other half and sand. You’re probably thinking the line down the middle won’t look good on the card! As you can see, the pattern seemed to sand more readily than the edge lines.  Only the edges will show on the card.

The next step is to cut the Lattice Rectangle pieces and hearts. The size of the Grand Calibur™ mats make it possible to cut many pieces at once.


Here’s a list of the die templates and paper colors to cut:
S4-319 Lattice Rectangles #4 - Cardinal Red Worldwin card stock
S4-136 Classic Heart #2 - Cardinal Red Worldwin card stock
S4-319 Lattice Rectangles #2 – White Worldwin card stock
S4-137 Classic Scalloped Heart #3 – White Worldwin card stock
S4-319 Lattice Rectangles #3 – strip of White Worldwin card stock
S4-136 Classic Heart #3 - Bashful 3M Post-It Craft Paper
S4-137 Classic Scalloped Heart #2 – Bashful 3M Post-It Craft Paper


Next, emboss the red and white Lattice Rectangles.  At the same time, emboss the pink and red hearts laid over 12-1009 Flourish Impressabilities.  They all fit easily on the mat. Sand both embossed hearts and edges of pink scalloped heart. 


Sanding the red heart accents the embossed pattern by slightly changing the color.

Stamp “with Love” on a scrap of Bashful paper with Versafine Black Onyx ink.  Heat emboss it with clear embossing powder. Position S4-319 Lattice Rectangles #1 over “with Love” and tape the die template in place for cutting. (It really is stamped with black ink. The shine makes it look metallic in my photo!)


After cutting and embossing it, sand the edges to reveal the embossed pattern.


Here are all the cut pieces.


The next step is to score the white Lattice Rectangle to fold over the pocket on the red Lattice Rectangle.  The score line is almost 3/4" from the lattice edge.  Score half way through the first edge scallop after the corner.


To make a pocket for the pink heart and change the Lattice Rectangle die cut into a square, score about
1 ¾” from one end.  Use the lattice pattern as a guide, scoring between the 2nd and 3rd  scallop after the corner scallop.  Make another score 1 scallop away (about ½”), turning the paper over to the back to make a score for a valley fold.


You can see the 2 scores here.


Here you see how both pieces folded look after folding. Trim the straight edge of the white piece to about 3/8” from the fold so it will fit into the tiny pocket on the red lattice “square”.

Next, stamp “for You” at the bottom of the red lattice with Versafine Black Onyx and heat emboss it with clear embossing powder.


Here are all the pieces! 

To assemble, peel the backing from the pink embossed piece to fasten it to the white card.  The white lattice is glued to the fold of the red lattice piece. I used SCRAPBOOK ADHESIVES BY 3L™ Craft and Photo Tape to secure the pocket ends.  Then, adhere it to the card front.  Layer the pink embossed heart onto the white scalloped heart and tuck it into the pocket.  Use SCAPBOOK ADHESIVES BY 3L 3D Foam Squares just at the top to hold it in place.  The little red heart is glued to the pink scalloped heart and fastened over the white lattice of the pocket with 3D Foam Squares again just at the top.  The “with Love” piece is popped up with Foam Squares, too.  Thread and knot ribbons through the 2 larger buttons.  Stick in place with a Craft Glue Dot.  The little button has pearl cotton through the holes.  Fasten it to the card also with a Craft Glue Dot.


And that’s how to get a square out of a S4-319 Lattice Rectangle die cut!   It makes a cute Valentine’s Card, don't you think?

Supplies:


Spellbinders™ S4-319 Lattice Rectangles
Spellbinders™ LF-161 Grand Labels One
Spellbinders™ S4-136 Classic Heart
Spellbinders™ S4-137 Classic Scalloped Heart
Spellbinders™ 12-1009 Flourish Impressabilities
3M Post-It™ Craft Paper – Bashful
Worldwin Paper – Red Cardinal, White
Waltzingmouse - Vintage Ornaments set: “with Love”, “for You”
SCRAPBOOK ADHESIVES BY 3L™ – EZ-Runner, Craft & Photo Tape, 3D Foam Squares
Glue Dots™
Buttons – Red, White
1/8” Ribbon – White Satin, Pink Grosgrain
Pearl Cotton - White


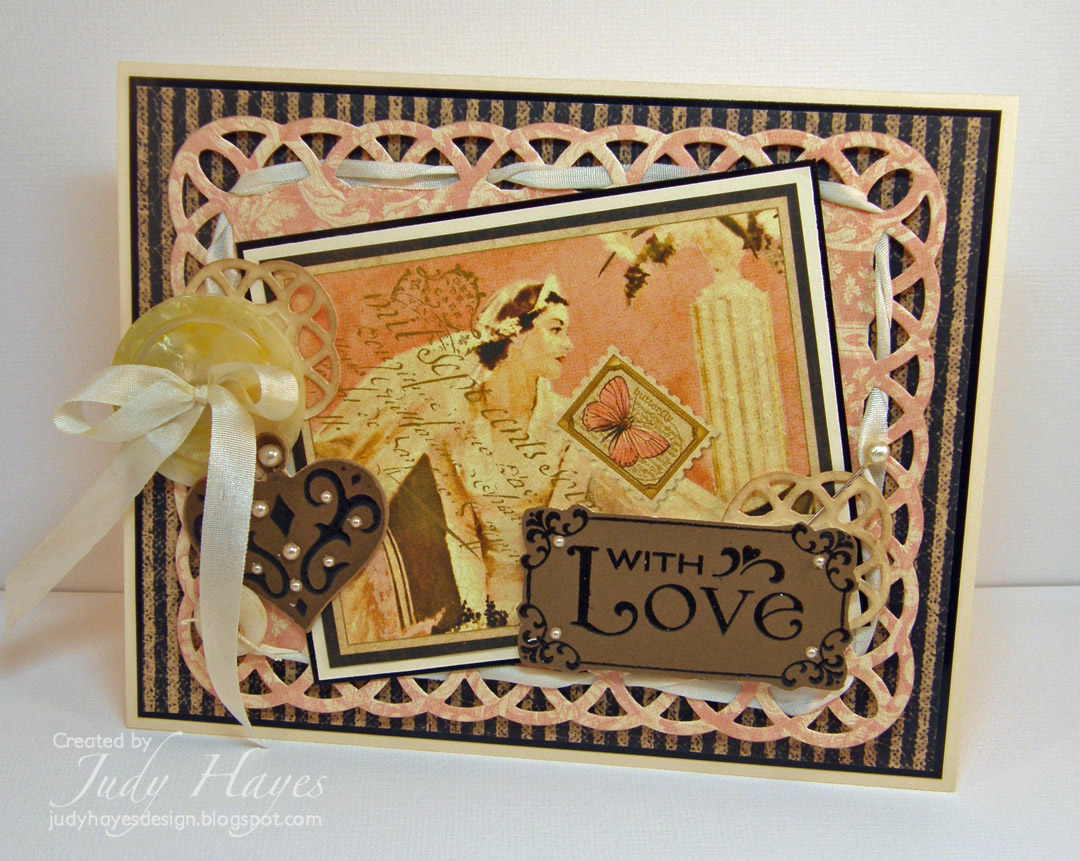
Here’s another “Love” card with a totally different look using S4-319 Lattice Rectangles


This is the Spellbinders product I introduced:


Lattice Rectangles

SKU # S4-319
MSRP $24.99

Measurements:


1: 1¼ x 1½″
2: 1⅞ x 2⅜″
3: 2¾ x 3½″
4: 4⅛ x 5″


This blog contest is now closed!


Click here for the Spellbinders Paper Arts To DIE For!! Winter Release Rules.

TO ENTER MY CONTEST: (Contest is open for entries from 12:01 a.m. January 11, 2011 to 12:01 a.m. January 13, 2011 Central Standard Time)

1) Send your email entry to: Reveal4@spellbinders.us (either click the link or type the address into your email program)
2) The subject must be Lattice Rectangles.
3) Send!

I love your comments! Unfortunately your comment does not count towards a contest entry, so be sure to enter and then leave a comment!

If you have any questions, please e-mail ContestQuestions@Spellbinders.us

Thank you for visiting and good luck!!!
-judy