Thursday, February 23, 2012

Birthday Flowers

I found some time Monday (a day off from work!!!) to make a card for fun!!! 
Here's a birthday card featuring the new Bitty Blossoms, Spellbinders S5-086 by Donna Salazar.  The flower size is perfect for cards!


There are 3 sizes of flowers along with 3 leaf die templates in the  set.  I've used the 2 smaller flowers for this card.  The pink and yellow one are the same.  I added glitter to them after they were shaped.   For the greeting, I used a long pennant from S5-029 Nested Lacey Pennants.  The verse is from Waltzingmouse Fancy Phrases.  All papers are from the Carmen Collection by Anna Griffin.  I colored the pearl head pin with Copic marker E97.


Happy Creating!
-judy

Supplies:

Anna Griffin Carmen Collection paper
Waltzingmouse Fancy Phrases
Sparkle and Sprinkle Glitter - Sunny Daze, Starfire
Sparkle and Sprinkle Brushable Glue
Creative Impressions Yellow ribbon
Versafine Onyx Black ink
Glue Dots
Pearl head pin
Copic marker E97
Ivory Cardstock
Green Chalk

Sunday, February 19, 2012

A Soft Blush Sympathy Card

I finally took some time to stamp for myself!  Hooray I have a card to share!

On Friday, after work, I stopped at my favorite stamp store and picked up a new set of JustRite stamps.  I hoped some new stamps would get me inspired to stamp!  I've been doing a lot of creating but mostly paper crafting or mixed media without stamping.  It's time I got back to it!
This card went together fairly quickly once I decided on papers and ink.  (I wish the project I worked on all yesterday afternoon had gone as well.....) 


When I bought the new stamps I also picked up a few 6 x 6" papers by Authentique.  Love these new papers created just for card makers......all small prints, all 6 x 6" 2-sided papers.  These 2 soft peachy papers seemed perfect for a sympathy card.  Unfortunately, I've needed a number of those lately.


Supplies:
Authentique Papers - Series One "Blush"
Want2Scrap - Baby Le Creme Pearls
Bazzill Card Base
Ranger Slate ink
Copic E04
White Cardstock

I stamped the frame first with Slate ink.  I was surprised how well this color coordinated with the papers!  Next, I aligned  Spellbinders Label Eighteen #5 around the stamped frame and taped it in place.  Then I placed the Classic Ovals #3 over the opening in the stamped frame, again taping it place.  I cut and embossed it.  I sanded the edges lightly to reveal the white core of the paper.
I stamped the verse on a scrap of white cardstock using Slate ink.  I simply trimmed the edges with a scissors to fit behind the frame and adhered it in place.
Next I cut the background printed paper with Spellbinders Labels Twenty-Five #5.  This is a new set from Spellbinders just released at CHA!  I like how well it layers with Labels Eighteen!  Again, I sanded the edges.  The white edge really adds interest and dimension!  It needed a little something at the top and bottom so I stamped the scrolls. I really like that JustRite included this scroll with a matching reverse image!  To get the placement I wanted, I laid the stamps on the frame just how I wanted them to stamp.  Then I carefully pressed an acrylic block onto the stamps.  Voila!!!  The stamps are aligned and ready to stamp.  I just needed to get them straight when I stamped them.  That's easy to do with clear stamps!  I added a few Want2Scrap pearls to the scrolls.  These I colored with Copic E04 to coordinate with the papers.

The card base is 3 1/2 x 6 1/4".  I stamped the same scrolls at each corner only aligned differetly.  I also stamped them off once before stamping on the card for a very soft color.

The verse with frame is mounted with foam tape.  I added pearls to the corners and on the sides. I stamped one of the verses from this same set on the inside. 

I think I'll make a few more of these out of different colors.  Then I'll have some on hand. 

Thank you for visiting!

Happy Creating!
-judy

Tuesday, February 14, 2012

Thrilled to announce that I made the Spellbinders Design Team for 2012!!!!  This will be my 3rd year!  At times, it still seems like a dream!!!   It's such an incredible honor and opportunity to be on this team.  Spellbinders, you rock!!!

You can see all the names of the incredibly talented 2012 team on the Spellbinders blog post for today.  Just click here!

Congrats to everyone!!!  See you in Arizona!

-judy

Thursday, February 9, 2012

Black, Red and White Cut-Fold-Tuck Card

I have a card to share today created with one of the new Spellbinders Cut-Fold-Tuck die templates.  These are such easy to do shapes that look so intricate and hard.  Really, they are so easy!!! 


The Cut-Fold-Tuck shape I used is from the set called Angle Approach S5-111.  I used a paper from KaiserCraft that has the white/black/red pattern on one side and red on the back.  Double sided papers work so well for the Cut-Fold-Tuck shapes!  
I actually cut 2 of the largest Angle Approach, one of white with red back paper and another one of solid black cardstock.  I made the folds and tucks on both of them.  I flipped the black one over and fastened it behind the red/white one off set slightly.  I flipped it because I wanted the little openings along the edge to show opposite the openings on the front one.   Bits of the black one show thruough the openings in the red/white one.  I've folded and glued all the little pieces near the center allowing the black to show from behind.  I added a black pearl to the center. These are layered onto a red circle.
The black mat was cut with Spellbinders Grand Labels One and then embossed with Spellbinders™ M-Bossabilities™ Imperial.  I love how deep these folders impress the pattern into cardstock!  
A square mat of red cut using Spellbinders Grand Squares layered onto a white square card finishes the card front.
I added a tiny tag cut with Spellbinders S5-028 Nested Pennants.  I cut the tip off and punched a tiny hole for the string. The greeting is from Waltzingmouse.

Spellbinders did a live feed on the first day of CHA to show all the new products. I did a short demo of the Cut-Fold-Tuck process. You can see the video on the Spellbinders blog post for January 29,2012. Click here to go to it! You'll need to click on the link to get to the video. The demos are in the 2nd half of the feed.

Thanks for visiting!  Watch for these new SPellbinders Cut-Fold-Tuck die templates in your LSS sometime in March!!!

happy creating!
-judy

Saturday, February 4, 2012

CHA tidbits


Hello all!

I wrote most of this post at CHA and couldn't get it to post!!! I tried many, many times. The app on my phone just wouldn't load it!

I'm home again now!   I had a fabulous time at CHA!

Very good attendance in the Spellbinders booth!!! My legs and feet were very tired at the end of each day...long days standing.

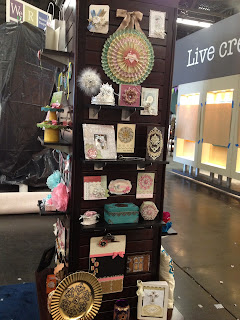
These photos were taken during set up.


The projects displayed are from the Blog Frenzy.


These projects are from a new book featuring Spellbinders called "Quick & Easy Crafts
for Entertaining". One of my projects is on the top shelf!


My graduation ensemble in the book.


I helped with a class given by Julianna Hudgins on Saturday night. She has a new line
of die templates with Spellbinders!


It's tradition at CHA to open the show with bagpipes!


Stacey Caron from Spellbinders signed copies of the new book on the first day of the
show.


Holly Simoni with me in the booth.

Wish I could share more photos of the booth but I can't. Many of the projects have been
selected for publication. A couple of mine were chosen!!! So awesome!!
On my lunch break I tried to see as many of the other exhibitor booths as I could.


I watched Jacqueline demo her La Blanche line of stamps. She stamps incredible collages which she colors with Ranger nibs and Distress inks. So inspiring to watch her!


Of course, I watched Tim demo, too. His new markers are a "must have"!
I stopped at my favorites: Penny Black and Ranger. Both have such inspiring projects.  I really didn't see much else to get excited about.

This weekend I'm finishing my final round project for the 2012 Spellbinders Design Team. The die templates they sent to use are definitely challenging!!! Gotta get it done by Monday.

Thanks for visiting!
Happy Creating!

Judy