Sunday, February 25, 2018

"I AM" Mini Album with Grand Arch 3D Card

Hi everyone! 
I'm back with a mini album created with Grand Arch 3D Card – 3D Vignettes from Becca Feeken's Amazing Paper Grace dies by Spellbinders.  This album is called "I AM" Mini Album.


It's created with Amazing Paper Grace Grand Arch 3D Card – 3D Vignettes for base of the album.  I've added hand sewn page signatures between the Grand Arch 3D Card pages.  I also used Ornamental Arch – 3D Vignettes, Cinch and Go Flowers III – 3D Vignettes, Cinch and Go Flowers and Arched Swallowtail Pennants.

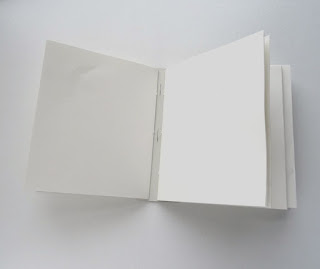
Here are the pages, covers and spine pieces. 


The tabs are cut off of the covers and pattern paper for the covers.

I made sewn book signature pages of drawing paper to add between the divider pages.


Five pieces of paper cut 8 ⅜ʺ x 4 ⅞ʺ make up each signature, three signatures in the mini album. Each signature was scored, folded and holes poked in fold.  Holes that match in spacing were added to spine piece of album.  Each signature was sewn into spine between cuts for divider pages.  I recommend making hole spacing so center hole isn't next to cut slots.  I didn't think of that soon enough so it was a little hard to put tabs into the spine.

Here you can see stitching of signatures into spine.


Here's what the pages look like before adding dividers into the slots.

 
I next added the divider pages. 


The tabs were secured to the spine with Extreme Double-Sided Tape ¼ in. 


Then black check paper was fastened over spine to hide tabs.  Again I used Extreme Double-Sided Tape ¼ in at edges to secure it well. 


 Patterned paper was fastened to front covers using Adhesive Sheets 6 x 12 inch applied to each piece. 
 
The front cover is decorated with an arched frame cut with Ornamental Arch – 3D Vignettes. I cut two and fastened them together for more dimension.  A solid lighter color paper is behind it.
 
 
The piece with "thankful, grateful, blessed" was cut with Arched Swallowtail Pennants #3 (#1 being smallest). It was trimmed to fit.  I used the label from Grand Arch 3D Card – 3D Vignettes across the bottom popped up with Thin 3D Foam Squares White Mix.


Little flowers cut with Cinch and Go Flowers #1 and #2 frame the label, each fastened with DODZ™ Adhesive Dots Medium.  Each flower has a center made with 2 DODZ™ Adhesive Dots Medium on top of each other and covered with embossing powder (not heated).  A few leaves cut with leaf stem from Cinch and Go Flowers III – 3D Vignettes are tucked in behind flowers.  Knotted seam binding is fastened with DODZ™ Adhesive Dots Medium also.


I added patterned paper to each divider page on both sides, again using Adhesive Sheets 6 x 12 inch to apply adhesive. 
 
Here's the page inside the front cover:


I made a pocket cut with arch frame from Ornamental Arch – 3D Vignettes.  Arch part is folded down  showing  paper back pattern.  A journal page is tucked into it.

Here's another divider page....
 
 
The "I Am" page is from Simple Stories I AM Vertical Elements.  I cut the words from that page and popped them up with Thin 3D Foam Squares White Mix.

Another divider page...

Another arched frame cut with Ornamental Arch – 3D Vignettes.  Little flowers and leaves along the side.

Inside the back cover...

 
On the left is a pocket with slide out journaling card.  Inside the back cover, is a flip page made with pieces cut with arched die from Grand Arch 3D Card – 3D Vignettes.  I cut decorative paper with Arched Swallowtail Pennants and trimmed them to fit.  Another small flower decorates the top. 
I hope you enjoyed this I AM Mini Album tutorial. I love making handmade books!  This was fun to put together and decorate. 

Be sure to check out Becca's Amazing Paper Grace blog post on February 27, 2018.  She'll show all the books made by Amazing Paper Grace Creative Team.  Loads of inspiration!

Thanks so much for visiting!

Happy Creating!

judy
 

Supplies:
 

Ornamental Arch – 3D Vignettes
Cinch and Go Flowers III – 3D Vignettes
Cinch and Go Flowers
Arched Swallowtail Pennants


DODZ™ Adhesive Dots Medium
E-Z Runner® Ultra Refillable Dispenser
Thin 3D Foam Squares White Mix
Extreme Double-Sided Tape in
Extreme Double-Sided Tape ¼ in

Simple Stories - I Am Collection
Echo Park Wedding Bliss Lt. Pink/Pink
Bazzill Paper – Taffy, Aqua
Olive Green card stock
Dark Yellow Embossing Powder
Seam Binding

Sunday, February 18, 2018

Rosette Happy Birthday Z-Fold Card


Hello friends!

Today I have a Rosette Happy Birthday card to share. I created this card for Amazing Paper Grace Creative Team. Our challenge this week was to make a Z fold card.  A new venture for me!

 
I used two new dies from Amazing Paper Grace 3D Vignettes collection:  Spellbinders Tiered Rosettes – 3D Vignettes and Spellbinders Layered Happy Birthday – 3D Vignettes.  Different sizes of rosettes can be made with Tiered Rosettes die.  I cut one from white paper and one from patterned paper, each with a different edge.  There are 3 pieces put together in this rosette.  I layered them to form a two tone rosette. 
I used Layered Happy Birthday to cut the center image.  I paper pieced different papers for the balloons at the bottom.  The rosette is fastened to a 5.5 x 6 inch Z-fold card.  Paper for the card base is 6 x 11 inches with folds at 2.75 and 5.5 inches.  The smaller insert is 4.25 x 9.75 inches with folds at 4.25 and 7 inches.  I added patterned paper to outside and inside.
 
 
You'll find more inspiration with 3D Vignettes at Amazing Paper Grace blog.
 

Thanks for visiting!
happy creating,
Judy

Sunday, February 11, 2018

Filigree Numbers Congratulations Card

Hello everyone

Today, I've made a masculine congratulations card showcasing Becca Feeken's new Elegant 3D Vignettes Filigree Numbers.  I really like the vintage look of these numbers!  Plus, I've used the new Elegant 3D Vignettes Tiered Rosettes die.


I designed this card to be a retirement card celebrating 30 years.  However, it could easily be a birthday card or anniversary card.  Change the numbers to whatever is appropriate! 

The numbers were cut from black cardstock with Adhesive Sheet applied to back for the filigree number.  Solid numbers were cut from black cardstock.  The filigree number was fastened over solid number. So easy with the Adhesive Sheet applied to back!  The gold color is DecoArt Metallic Lustre Gold Rush rubbed over the raised areas.  I like the vintage look it gives to the numbers!  
Behind the numbers is a black rosette die cut with S4-869 Elegant 3D Vignettes Tiered Rosettes from text weight black paper.  It's much easier to fold the text weight paper!   I used 2 rosette pieces fastened together with adhesive from E-Z Runner® Ultra Refillable Dispenser   The center is covered with a circle cut from same paper.


The decorative piece  S4-818 Eliza Lace Corners below "congratulations" was cut from black cardstock and also rubbed with Gold Rush Metallic Lustre. S4-820 Vintage Pierced Banners  die was used to cut the banner with congratulations on it.  I cut a second one from black cardstock, cut it half horizontally and fastened each half behind congratulations at top and bottom. The edges have Gold Rush Metallic Lustre on them. The whole thing is popped up with Crafty Foam Tape Black and Thin 3D Foam Squares Black Mix
The background is burlap paper cut with largest S4-606 Arched Swallowtail Pennants.  It's layered over another pennant cut from Kraft cardstock which was cut in half vertically and fastened to make a border on each side.  I added a smaller pennant centered at bottom. 
The finishing touch is pearl cotton tied along the fold with small bronze beads knotted on the ends. 


I hope you've enjoyed your visit today! 
Remember to think creatively and keep crafting!

Judy

Amazing Paper Grace Dies by Becca Feeken:


Other Supplies:  DecoArt® Metallic Lustre Gold Rush, DCWV Burlap Paper, Tim Holtz/Stampers Anonymous Stamp, Imagine Crafts/Tsukineko Versafine Onyx Black ink,  Black Cardstock, Kraft Cardstock, Black Text Weight Paper,  Black Pearl Cotton, Bronze Beads


Wednesday, February 7, 2018

INTRODUCING AMAZING PAPER GRACE – 3D VIGNETTES


Welcome friends, today we are introducing a new die collection by Becca Feeken for Spellbinders called 3D Vignettes.

3D Vignettes is a series of dies that can be included in a Grand Base die to create 3D upright cards that folds down flat to go into an envelope - a collapsible tunnel card!  You can see it in action in the 1.5 minute video ------> HERE.

Where these Vignettes are unique, is the ability to die cut or not die cut each and every layer for an ethereal see through dimensional creation.  The collection was designed to cut out whole or to be cut out inlaid for inclusion in a Grand Base.  The collection centers around three themes - baby, love and birthday, and today we show you traditional uses but with a little dreaming, only the sky is the limit.

The dies and elements can be used as standalones or in the Grand Base. There is a good degree of mix and match ability across the entire collection.  The other designers have made three cards to show you how easy it is to isolate different sets or combine them all into one, they are:
  • The Simple Card - There are two layering dies which can be used as inserts or used on their own in regular cards.
  • The Embellished Card - There is a set of shaped dies, these add drama or can be used on their own in regular cards.
  • The Decked Out Card - There is a 3D Grand Card, standing, yet collapsible, made for use with purchased inserts or to use with dies from your own stash
By now you've seen all the dies in the collection.  I'm going to take some of those same dies and flip the script a little bit.  I've created an "Oh Happy Day" mini album with Grand Cabinet Card dies. The pages are assembled on the left side same as a card, then the tabs are secured flat and covered with cardstock to make the album binding. I simply snipped off the tabs on the outer edge of each page. The covers were cut of light cardboard, plus 110 lb. cardstock and patterned paper.  Each page base is 110 lb. cardstock with decorative papers covering both sides.  Two pages have frames open at top to tuck in photos, two pages have flip pages for multiple mini photos, or journaling, and in back is a pocket to store memorabilia. Three of the same pages have pockets on the side edge with inserts peeking out, a place to journal. The cover is decorated with the beautiful intricate border from Grand Cabinet Card layered over peach paper and then over script paper.  It's embellished with tiny paper flowers, gold leaves and a silk bow.  "Oh Happy Day" was cut from black cardstock multiple times and layered for dimension, then rubbed with gold metallic wax.  I love how this turned out!  What fun to make it to celebrate a special happy day!

The sets I'm using today  S6-139 Grand Cabinet Card, S4-867 Cinch and Go III, SDS-116 Oh Happy Day


Availability:
These dies are available on February 13, 2018 - get email notification the moment they are loaded by clicking on the die set and putting your email address and clicking on Notify Me -------> HERE.

In the meantime, be sure you leave a comment on this post for a chance to win an Amazing Paper Grace Die from the Chantilly Lace Collection.

Prizes:
There are six dies that are being given away. One name will be randomly picked from comments left on each of our six blogs on the Introducing 3D Vignettes post between February 7 and February 11, 2017 at midnight US Central Time and our international friends can participate!  The randomly selected names will be announced on the Amazing Paper Grace Blog on February 12th.  (All giveaways for this hop are managed by and the responsibility of Amazing Paper Grace)

Up for grabs is an Amazing Paper Grace die of your choice from the Chantilly Lace Collection; there will be a total of six dies and a winner can win once among all six blogs.   If your name is selected, simply claim it within 2 weeks of announcement by sending your address through the form under the Contact Tab on the Amazing Paper Grace Blog. The dies will be mailed out from Amazing Paper Grace.

Click the links to get to more sweet samples:
Visit Joanna   - joannakrog.blogspot.com to see her 3D Vignettes Cards with the Love Theme.
Visit Teresa   -  victorianpaperqueen.blogspot.com to see her 3D Vignette Cards with the Birthday Theme.
Visit Jo           -  prettypaperpearls.blogspot.com/ to see her 3D Vignette Cards with the Baby Theme.
Visit Melissa  - keepsakesbymelissa.blogspot.com  as she shows off Large Filigree Numbers
Visit Becca     - amazingpapergrace.com/blog to show what she's doing with Layered Rosettes
You are here(Judy)  -  judyhayesdesign.blogspot.com/ with a clever project using one of the 3D Bases

Thanks so much for joining us for Introducing 3D Vignettes!
Leave a comment - tell us, which of these dies is closest to your heart?