
I posted this card to
Artistic Outpost's blog yesterday. I had stamped & colored this image from
Artistic Outpost's Snowy Woods set several months ago. It's one of the first images that I colored with my Copic markers. I thought it would be a quick start to a card..........
well, it wasn't really quick because I took photos along the way so I could show you some of my steps.
I first created the torn paper that I used as a background mat.
Here's the how-to:

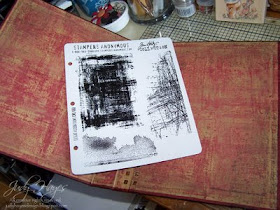
I started with some lightweight Kraft packing paper......already wrinkled.
Great way to recycle! I wadded it into a ball to get more wrinkles and then smoothed it out again.

Next, I rubbed Distress Peeled Paint over the wrinkles using the pad directly on the paper. I dried the ink with my heat tool and wadded it into a ball again.

Then, I added Vintage Photo.........

More ink..........Brushed Corduroy this time.....

...........again with Aged Mahogany......

Next, I sprayed on color.......... I mixed 1 dropper of Brushed Corduroy & 1/2 dropper of Scattered Straw in a Mini Mister with water.
I dried the first layer with my heat tool and then resprayed it for more color. The paper is wonderfully soft & flexible now, tears great. I have enough for several projects.
Here's some of the steps for the card:

For the card front mat, I stamped the branch with Scattered Straw around the edges of some light tan Bazzil
(sorry, I don't know the name). I also added Vintage Photo & Brushed Corduroy to the edges.

I stamped these little parts all at once. I cut out the package & Dec 25 and colored them with Antique Linen, Vintage Photo & Aged Mahogany inks. I drew a red marker line along the string on the package before I distressed it.

I used the smallest
Spellbinders Labels Four for the Joyeux Noel. I embossed it & added Antique Linen ink before removing it from the die. I added a narrow dark red edge with permanent marker by keeping the marker tip on scrap paper, touching the label edge as I ran it along the edge.

I used white paper for the card itself.........white is a good base to show true ink colors. Besides, I didn't have a color that seemed right. I have lots of white paper.
I stamped the branch with Vintage Photo first. Then I added branches stamped with Peeled Paint, some once stamped off.

I sprayed all of the inside with the same Distress mixture: Scattered Straw, Brushed Corduroy & water and dried it with my heat tool. I also ironed it to dry & flatten it. The verse is stamped with Ranger Archival ink.......permanent & not water reactive.

I swiped the back of the card over my glass stamping surface that had inks all over it. It sort of got that way by accident so I helped it a little. Then I added Vintage Photo with Cut n Dry foam.

The old fashioned Santa is stamped with Memento Tuxedo Black. I colored the Santa & trees with Copic markers: B02, E31, E35, R37, R59, G85, W1. I rubbed Anitque Linen over the whole thing leaving the area around the verse lighter. I added a little Vintage Photo to the edges.
 The stamped image is layered on dark red & very dark green Bazzill papers with edges frayed. I tore a piece of my colored Kraft paper to layer underneath. I added 2 pieces of jute, wrapped & glued to the back of card front mat. I tied a knot at the intersection & added a red floss knot. The package, Dec 25 & Joyeux Noel are all mounted on 2 layers of foam tape (the foam is at the end on the label so it fits over the jute).

I added several little branches cut from 2 different punches: McGill & Martha Stewart.
Hope you enjoyed this glimpse of
Creating...my style!
Feel free to email or leave a comment if you have any questions.........


 First, I cut a cardboard frame to size to fit the blank space on the cover. I laid out my title using Grungeboard letters over some drywall mending mesh all stuck to lightweight chipboard.


